• Registration is disabled due to constant spammers. Email [email protected] and we will temporarily re-enable registration for you.

Travis's Panzer Corps Dynasty

Travis7401

Douglass Tagg
Community Liaison
Image has been scaled down 8% (952x536). Click this bar to view original image (1024x576). Click image to open in new window.
12333149235_2f8e9ec468_b.jpg


I'm going to make a dynasty for my play through of the 1939 volume of the 10 volume Grand Campaign downloadable content for the game Panzer Corps. This game is a re-make of the classic game Panzer General with a lot of improvements to graphics and gameplay. It is a classic "Beer and Pretzels" style strategy game. The gameplay mechanics are easy to learn but the game will always present you with a challenge no matter how good you get.

The basic idea behind the Grand Campaign is you start with a small core group of units that you carry with you through the whole campaign. I'll be playing the first year of the war and there are either 10 or 11 scenarios (depending on success) covering the German invasion of Poland. As I proceed through the campaign, my core units will gain experience and heroes based on their performance and I'll also be given the opportunity to purchase more core units to tailor my force to my own preferences. Core units are purchased/repaired/upgraded by using "prestige," which is gained by accomplishing objectives, destroying enemy units, capturing cities, etc. At the end of this campaign, my core group will be saved for the 1940 invasion of France, so managing losses and spending of prestige is as important as "winning" any given battle. Each battle can end in one of 3 possible outcomes, a Decisive Victory, a Marginal Victory, or a loss. The campaign is somewhat dynamic, offering different paths based on the outcome of certain scenarios. In certain scenarios, a loss ends the campaign, while in other scenarios, loss is acceptable and will keep you in the campaign. The balance between gaining prestige by earning a decisive victory at great cost or accepting a marginal victory or even loss while protecting core units needs to be considered. Most scenarios also contain additional cities to capture and opportunities for adding prestige if you've already met victory requirements.

Anyway, here is the campaign tree for my current project.

Image has been scaled down 1% (952x952). Click this bar to view original image (960x960). Click image to open in new window.
9ECm1Gx.jpg


The first mission is "Poznan" which is the initial German Blitzkrieg invasion of Western Poland and I'll post more about that later.

(Bear with me wall I copy pasta)
 

Travis7401

Douglass Tagg
Community Liaison
The first Scenario, Poznan, starts with a debriefing that I forgot to capture, but the upshot is I'm supposed to storm into Poland as fast as possible to catch the defending polish troops by surprise. The border troops start out suppressed and low on ammo, so if I can hit them fast they won't have time to resupply or call reserves. I'm supposed to capture a bunch of cities and it is suggested that I destroy as many polish air units and capture as many airbases as possible in order to sideline the polish air force for future scenarios.

Here are the scenario goals:
Image has been scaled down 8% (952x536). Click this bar to view original image (1024x576). Click image to open in new window.
12333303813_51acefc563_b.jpg


I get my first look at the map and my starting core has already been selected and deployed, and find I have enough to purchase a few units, so I check how many slots I have available for additions to my core and find that I have 4 spots for customization of my force.

The default core consists of the following:
2 x Standard Wehrmacht Infantry(1 with truck transport)
1 x Gebirgsjager Infantry (Mountain Troops)
2 x Panzer 1A Tanks (shitty tank)
1 x SDKFZ 222 Armored Car (Recon unit)
1 x 3.7cm Pak 36 (small towed anti-tank gun with truck transport)
1 x 7.5cm Artillery (small towed artillery piece with truck transport)
1 x BF109E Fighter (really good fighter for 1939)
1 x JU87 Stutka Dive Bomber (famous dive bomber from blitzkrieg)
1 x BF110C Fighter/Bomber (Good all purpose plane)

I've been given an additional auxiliary unit (for use in this scenario only) and it is a Panzer IIc, which is slightly less shitty than my Panzer 1a tanks. With the four remaining core slots I don't have much room for customization. I Decide to purchase an infantry group since the computer has decided to deploy all of my infantry in the south and none in the north. I also decide to buy a second SDKFZ armored car, because recon units are important in general and because armored cars are as good as tanks at this point in the war. With my final two core slots, I purchase two Panzer 38(t), which are actually Czech tanks and a precursor to the Panzer III. At this point in the war they are pretty decent tanks.

Additional Core Purchases:
1 x Wehrmacht Infantry with truck transport
1 x SDKFZ
2 x Panzer 38(t)

As I progress through these scenarios, I'll include any pertinent information about units that is contained in the Panzer Corps Library. I've attached screenshots if information about the BF109 and JU87 planes. Hopefully you can read the information

BF-109 Fighter:
Image has been scaled down 8% (952x536). Click this bar to view original image (1024x576). Click image to open in new window.
12333658043_a413ebbc37_b.jpg


Ju87 Stuka Dive Bomber:
Image has been scaled down 8% (952x536). Click this bar to view original image (1024x576). Click image to open in new window.
12333949124_fb50ee730b_b.jpg


For this first scenario, I'll write everything up turn by turn and try to explain some of the stuff I'm doing. For later scenarios, I'll probably skip some of the dull stuff and only focus on highlights. I also might try doing some of these after action reports as youtube videos at some point.
 

Travis7401

Douglass Tagg
Community Liaison
Here is the "Strategy" map at the end of Turn 1 with pertinent cities and plans of attack highlighted. I hate MSPaint, so I'll have to figure something different out for future write ups (Next time I'll make town names larger):
Image has been scaled down 51% (952x536). Click this bar to view original image (1920x1080). Click image to open in new window.
12333594724_328b6d3c69_o.jpg


My troops are shown in grey, while allied units are shown in green. Cities and airfields show up as dots on the map, and objective cities/airfields have a halo around them. There are 5 key cities to be captured and 5 potential airfields to be captured. Anyway, the bulk of my forces were deployed by the computer in the Southern portion of the map near the cities of Glogau and Trebnitz. A single armored car was deployed in the North near Frankfurt by default, but I added an infantry unit and a Panzer 38 (t). My air assets will probably have to spend a lot of time in the North since I have no artillery up here and only a small force.

My plan of attack in Panzer Corps always starts with an ambitious attempt to achieve decisive victory, but I like to make it easy to modify to seek a marginal victory in case resistance is tough. In pursuit of this plan, my Northern group will attack from Frankfurt East through Poznan and then on to Konin on the far East side of the map. If they are successful, they should also be able to capture several other small cities and 3 air fields along the way. I've only committed three units up here in the North, so if they fail or get bogged down, I will need my Southern group to be able to achieve the marginal victory objectives (capture of 3 key cities).

The Southern force contains the rest of my units. I wouldn't have chosen to deploy my forces this way if given the choice, as the Southern route to key cities is much longer... but in this first scenario I have to play with the hand I'm dealt. My plan is to move my force rapidly at the Railroad Junction. If I encounter entrenched infantry anywhere, I will bypass them with my panzers/armored car and continue further into Poland. My infantry and artillery will then move forward to handle any entrenched troops. If things are going well, I'll split my force at the railroad junction, sending part of my group North to capture an airfield and then continue on to Konin along the road that runs through Wreznia. The other half of the force will head Northeast from the Railroad Junction to attack Kaliz and pick up an airfield on the way. If things aren't going well, I'll keep my whole group together and push on through on that Northeastern Route toward Kaliz and then continue North to Konin. This plan should enable me to capture at least the Rail station, Kaliz, and Konin as my 3 objectives required for a marginal victory.
 

Travis7401

Douglass Tagg
Community Liaison
Turn 1:

I can't move the newly purchased core units, so action with my Northern group is limited to what can be done with my armored car and some air power. Recon units are unique because they can expend their movement points in multiple moves per turn, while other units are limited to a single move per turn. I moved the armored car up to within spotting range (3 hexes) of the airfield and town of Norwy Tamryl or some such name. I revealed a half-strength anti aircraft unit without ammo guarding the airfield and a half-strength anti-tank unit guarding the town. Seeing no major threats the armored car can't handle, I moved him forward and attacked the anti-air unit since it was suppressed and didn't have ammo. I killed the whole unit and then moved forward to occupy the airfield. NICE! There was also some shitty Polish biplane hanging out over the airfield, so I brought my fighter and figther/bomber over to attack it and killed the whole unit. I then brought a Stuka in and attacked the anti-tank unit and knocked it from 5 units (half strength) to 2 units.

Here is what the Northern sector looked like at the end of Turn 1:
Image has been scaled down 8% (952x536). Click this bar to view original image (1024x576). Click image to open in new window.
12333594294_f010bcfe7a_b.jpg


In the South, things weren't much more interesting. I encountered a half-strength cavalry unit and taught them that horses are no match for tanks in the open field. I knocked them from 5 units to 1 unit and they retreated before I could do more damage. I also spotted an entrenched anti-tank gun to the north. With an infantry unit and the armored car out front spotting for me, I see that there isn't much in the way of mobile threats from the poles, so I have no problem packing my artillery, infantry, and anti-tank gun up in trucks for faster transport. VROOOM VROOM.

Here is what the Southern sector looked like at the end of Turn 1:
Image has been scaled down 8% (952x536). Click this bar to view original image (1024x576). Click image to open in new window.
12333147405_f751631e64_b.jpg


So far I've encountered very weak polish resistance and things are going well. My newly purchased units will be available next turn and should only make things even better for me.
 

Travis7401

Douglass Tagg
Community Liaison
Turn 2

At the beginning of turn 2 I was gifted an extra JU87 for my core with some message about the commander being a drunkard or something
Laughing.png
This is a new element that I haven't experienced before, but I'll gladly take the extra unit.

On the Northern front, I smashed the remaining anti tank guns with my stuka and the Panzer 38(t) with the loss of one tank. I moved my BF-109 over to the airfield to scout for enemy units and found none. I drove my scout car up the road to within a couple of hexes of Poznan and spotted an entrenched infantry unit in the city and an anti aircraft unit guarding the airbase. I also spotted another shitty polish airplane, so I flew my fighter/bomber over and killed 5 out of 10 of his strength without losing any of mine. I'll need to destroy the anti-aircraft before I can really bring my bombers in to help dislodge the infantry from the city. Poznan and the adjacent airfield will take a few turns to crack, but there isn't really anything the force of 3 units with air support can't handle yet.

Here is what the Northern front looks like at the end of Turn 2.
Image has been scaled down 8% (952x536). Click this bar to view original image (1024x576). Click image to open in new window.
12333593004_96d02fc774_b.jpg


On the Southern front, The Polish cavalry unit reinforced hisself to 10 strength, so I decided to bring my artillery out of the truck and move it forward to apply indirect fire to suppress the horses before attacking with tanks to avoid any losses. I also attacked with that added drunk stuka captain to great effect. I destroyed the whole cavalry unit with a couple of tank attacks and no loses. Once again, we learn that horses are not a match for armor.

I also moved my armored car forward enough to spot a single infantry unit entrenched at the railroad junction without support from arty or AA. I decided to rush the scout unit forward along with a tank and my mountain infantry. These polish infantry looked to be conscripts, so I attacked with my mountain troops and killed 6 of them with no losses. It is unusual for me to attack entrenched infantry with my armor, but since there were only a few left I gave it a shot with my armored car and killed 2 more with a loss of 1 to the armored car. I chose to bypass the entrenched anti-tank gun for this turn since it occupies fortifications that aren't essential for me to capture.

Here is what the Southern Front looks like at the end of Turn 2:
Image has been scaled down 8% (952x536). Click this bar to view original image (1024x576). Click image to open in new window.
12333146245_7c802e22a9_b.jpg
 

Travis7401

Douglass Tagg
Community Liaison
Turn 3

On the Northern front, the computer used its turn to attack my fighter/bomber with the AA and their shitty polish airplane. They damaged 2 of my fighters, so I flew it back to one of my airfields to refuel and receive replacements next turn. I then flew in my BF109 to clean up the 5 strength Polish plane, and it did. It is in range of the AA, but this polish AA is kind of shitty so I'm not too worried. In this turn I positioned my scout car to block any enemy movement toward my infantry which is being shuttled to the front in trucks. The way movement works in Panzer Corps, each unit has a "zone of influence" that prevents enemy units from moving through multiple hexes which are adjacent to it. By positioning my scout car in protecting role for the infantry being transported in trucks, I made sure that any nearby enemy units can't rush in to take pot shots while my troops are vulnerable in their transports. Next turn I'll unload the troops and move them forward to root out the AA. During this turn, I also sent my Panzer38 (t) North to the unoccupied enemy airfield and captured it. Nice and easy.

This is what the Northern front looked like at the end of turn 3:
Image has been scaled down 8% (952x536). Click this bar to view original image (1024x576). Click image to open in new window.
12333591944_7a8724c44f_b.jpg


On the Southern front, I destroyed the remaining infantry guarding the Railroad junction and captured it. Since things are going well on both fronts, I decided to split my forces in order to attempt to achieve a decisive victory. I sent my scout car North along the railroad tracks and spotted a half strength AA unit and a full strength Polish TKS tank. I also moved one of my Panzer 1As forward as part of this group. With my remaining force, I decided to root out that AT gun so that I don't leave any enemy in my rear and so I can gain some extra prestige by capturing a non-objective "city" hex. I knocked the AT gun down to 2 strength with my stuka and a couple attacks from infantry and tanks. Attacking units get a "stacking bonus" for attacks when you have multiple friendly units adjacent to the unit you are attacking. So even if I don't want to attack with a unit, I still may move it nearby to gain this stacking effect.

here is what the Southern front looked like at the end of Turn 3:
Image has been scaled down 8% (952x536). Click this bar to view original image (1024x576). Click image to open in new window.
12333300533_515cda7517_b.jpg
 

Travis7401

Douglass Tagg
Community Liaison
Turn 4

On the Northern front, I moved my infantry forward and attacked the AA gun and then attacked with the scout car once it was weakened. I suffered minor losses to both, but trimmed the AA unit from 10 strength to 5 strength. I don't really need the aircraft on this front until I've handled the AA, so I sent them back South. I also moved my Panzer 38t forward to help with the assault on Poznan.

Here is what the Northern front looked like at the end of Turn 4:
Image has been scaled down 41% (952x536). Click this bar to view original image (1600x900). Click image to open in new window.
12333144725_25cda607e3_h.jpg


On the Southern front, I destroyed the AT gun and captured the fortification to gain some more prestige. I sent 2 tanks and the scout car to the North to handle the airfield area. On the computer's turn, they decided to launch a bit of a counter attack at the railroad junction with 2 cavalry units, a TKS tank, and an airplane that bombed one of my tanks. Thinking it was a fighter/bomber, I brought both my BF109 (which had been hit by the AA in the North during the computer's turn) and my fighter bomber down to attack it. Neither of my planes fared well and the polish fighter/bomber inflicted pretty solid casualties on them while only suffering the loss of 3 strength. I had better luck hitting the ground portion of the enemy counter attack when I sent my stukas to dive bomb the TKS tank and one of the cavalry units, inflicting solid losses on both. I finished the turn by re positioning my infantry and bringing my AT gun and Arty forward in truck transports to help out stopping the counter attack if necessary.

I'm not too worried about this, because it isn't anything my tanks can't handle, but I do wonder about splitting my forces at this point. I still think the decisive victory is within reach at this point, though.

Here is what the Southern front looks like at the end of turn 4:
Image has been scaled down 41% (952x536). Click this bar to view original image (1600x900). Click image to open in new window.
12333295593_f428839d72_h.jpg
 

Travis7401

Douglass Tagg
Community Liaison
This is my first real dynasty I've done, since I never had a computer that made this stuff easy. Anyone have suggestions/tips on what I could be doing differently to keep you interested or add to my presentation? I've played through the scenario at this point and have all the images captured, so it is just a matter of writing up each turn. I plan on posting at least turns 5-8 tomorrow, maybe more depending on how much time I get. I can also rename units, so if any of you'll want to be a tank commander or some shit, let me know and I'll send you on suicide missions and such.
 

Travis7401

Douglass Tagg
Community Liaison
Plotty Says: Reports look good. I like this kind of stuff being a social studies guy.

That said, I'd go desert fox on the Polish and bludgeon them into an oblivion with atomic weapon cheat codes. (Lugnutt style)
 

Travis7401

Douglass Tagg
Community Liaison
Turn 5

In the North, I finished wiping out the AA gun and moved my troops in for a siege on Poznan. Now that the AA gun is gone, I'll probably use more air power up here next turn. I flew my damaged and out of fuel BF109 back to base for repairs/resupply. Not too much excitement other than that.

Here is what the Northern front looked like at the end of Turn 5:
Image has been scaled down 41% (1143x643). Click this bar to view original image (1920x1080). Click image to open in new window.
12333585644_93327ec3ac_o.jpg


On the Southern front, I destroyed the AA and opened up capture of the airfield. I'll need to destroy that infantry as well, because I can't afford to leave troops in the rear to guard stuff in case they cause me problems. With the AA gone I flew over and bombed the troops with a Stuka. I advanced my scout car further North to watch for any counter attacks in this sector.

In the counter attack area, I managed to destroy the TKS tank by using a stuka attack and then following up with a tank. The full strength cavalry unit moved forward and the damaged cavalry fell back to replace losses. With the tank gone, I'm pretty sure I'll make short work of the cavalry next turn, especially since I've moved my towed artillery up to provide indirect fire support. I've also brought the towed AT gun forward to take over defense of the Railway station once I've moved the rest of my troops on.

Here is what the Southern front looked like at the end of turn 5:
Image has been scaled down 41% (1143x643). Click this bar to view original image (1920x1080). Click image to open in new window.
12333138175_5bd9e41cef_o.jpg
 

Travis7401

Douglass Tagg
Community Liaison
Mystique of the Panzer 38(t) Tank:

800px-Panzer_38%28t%29_Ausf._S.jpg


Quote:Wikipedia Entry:
The Panzerkampfwagen 38(t) was originally a Czech tank of pre-World War II design. After Czechoslovakia was taken over by Germany, it was adopted by the German Army, seeing service in the invasions of Poland, France and Russia. Production ended in 1942, when its armament was deemed inadequate. In all, over 1400 were manufactured. The chassis continued to be produced for Marder III (1942-1944) and Hetzer (1944-1945) tank destroyers, turretless assault guns, anti-tank guns and anti-aircraft guns.

The (t) stands for tschechisch, the German word for Czech; the Czechoslovak military designation was LT vz. 38. Manufacturer's designations included TNH series, TNHPS, LTP and LTH. The special vehicle designation for the tank in Germany was Sd. Kfz. 140.

Description:

The Panzer 38(t) was a conventional pre-World War II tank design, with riveted armour and rear engine. The riveted armour was mostly not sloped, and varied in thickness from 10 mm to 25 mm in most versions. Later models (Ausf. E on) increased this to 50 mm by bolting on an additional 25 mm armour to the front. Side armours received additional 15 mm armour from Ausf. E onward.

The two-man turret was centrally located, and housed the tank's main armament, a 37 mm Skoda A7 gun with 90 rounds stored on board. It was equipped with a 7.92 mm machine gun to the right of the main ordnance. This turret machine gun was in a separate ball mount rather than a fixed coaxial mount. This meant the machine gun could be trained on targets independently. Alternatively, the commander/gunner could couple the machine gun internally to the main gun and use it as a coaxial machine gun. The driver was in the front right of the hull, with the bow machine-gunner seated to the left, manning the 7.92 mm machine gun. As with many 1930s tanks, the bow gunner was also the radio operator. The radio was mounted on the left of the bow gunner.

Minor adjustments, such as adjustable seats for the driver and firmer footing for the commander/gunner and loader, were provided in German service. A total of 2,550 rounds were carried for the bow and turret machine guns. The driver could also fire the hull machine gun with a trigger fitted on the left tiller bar.

In German service, a loader position was added to the turret by reducing ammunition capacity by 18 rounds. All future Panzer 38(t) tanks were rebuilt according to this specification and those already in service were modified accordingly. The commander had to aim and fire the main gun.

The engine was mounted in the rear of the hull and drove the tank through a transmission with five forward gears and one reverse gear to forward drive sprockets. The track ran under four rubber-tired road wheels and back over a rear idler and two track return rollers. The wheels were mounted on a leaf-spring double-bogie mounted on two axles. Despite the large wheel size, the tank did not use a Christie suspension.

Opertational History

The Panzer 38(t) performed well in the Polish Campaign in 1939 and the Battle of France in 1940. It was better armed than the Panzer I and Panzer II tanks. It was on par with most light tank designs of the era, although it was unable to effectively engage the frontal armour of medium, heavy and infantry tank designs.

It was also used in the German invasion of the Soviet Union from 1941 onwards in German and Hungarian units, but was outclassed by Soviet tanks such as the T-34. Some ex-German units were issued to the Romanians in 1943, after the loss of many of the Romanian R-2 tanks. By then, it had become largely obsolete, though the chassis was adapted to a variety of different roles with success. Notable variations include the SdKfz 138 Marder III mobile anti-tank gun, the SdKfz 138/1 Grille mobile howitzer, Flakpanzer 38(t) and the Jagdpanzer 38(t) "Hetzer" tank destroyer. Small numbers were also used for reconnaissance, training and security duties, such as deployment on armoured trains.

Panzer 38(t), Soviet Union, June 1941
The well-known German tank commander Otto Carius, who was credited with over 150 'kills' described the following action in a 38(t) in July 8, 1941:
"It happened like greased lightning. A hit against our tank, a metallic crack, the scream of a comrade, and that was all there was! A large piece of armour plating had been penetrated next to the radio operator's seat. No one had to tell us to get out. Not until I had run my hand across my face while crawling in the ditch next to the road did I discover that they had also got me. Our radio operator had lost his left arm. We cursed the brittle and inelastic Czech steel that gave the Russian 47mm anti-tank gun so little trouble. The pieces of our own armour plating and assembly bolts caused considerably more damage than the shrapnel of the round itself."

In contrast, these are his words about the German made armour:
"Again and again, we admired the quality of the steel on our tanks. It was hard without being brittle. Despite its hardness, it was also elastic. If an anti-tank round didn't hit the armour dead on, it slid off on its side and left behind a gouge as if you had run your finger over a soft piece of butter."

Above report highlights the reason why 38(t) was pulled out of front lines in favour of heavier Panzer III, IV and StuG IIIs. Panzer 38(t) continued to serve after 1941 as a reconnaissance vehicle and in anti-partisan units for some time. Several captured examples were refitted with Soviet DTM machineguns and employed by the Red Army.

Reliable running gears and chassis proved useful throughout the conflict. At the start of Operation Barbarossa, the Germans found Russian T-34 tanks to be superior, as the German 37mm Pak36 anti-tank gun proved incapable of penetrating the T-34's armour. To neutralize the Russian T-34, the Germans mounted a captured Russian 76.2mm field gun on the chassis of the 38(t) model as a stop-gap measure and called it the "Marder III". Initially, the Marder III was nothing more than a 38(t) with a Russian 76-mm divisional gun M1936 (F-22) in place of a turret, with the breech modified to take German ammunition. Because of this arrangement, crews of early Marder III models fought exposed on top of the 38(t)'s engine deck, behind where the turret used to be. Continuous efforts to provide Marder III crews with more protection eventually lead to the tank destroyer Hetzer which still used the same running gears on widened chassis and slightly widened track links to compensate for the extra weight of the armour. When Germany was being attacked from both West and East, the Hetzer served the German Army as one of the most common German AFVs in the last year of the war. Production of Hetzer continued for the Czechoslovak Army after the war. Switzerland purchased 158 examples. Swiss Hetzer served into the 1960s.

The removal of turrets from Panzer 38(t) tanks for conversion of the chassis to tank destroyer and other uses freed 351 turrets for use in fortifications in various locations. Almost half of these (150) were used in Southwest Europe, while 78 went to the Eastern Front, 75 to Norway, 25 in Italy, 20 in Denmark, and 9 in the Atlantic Wall. The small-bore armament and thin armour of the turrets made them insignificant as an anti-tank pillbox by the later stages of the war, but they were still useful in combating infantry attacks.

The SdKfz 140/1 Aufklärungspanzer 38(t) is a reconnaissance vehicle based on Panzer 38(t). It came about from a shortage of light reconnaissance tanks. Panzer I was outdated and the Panzer II Luchs was only just starting production. To fill this gap, Panzer 38(t) mounting smaller 20mm gun was built in small numbers. The basic construction was to remove the 38(t)'s turret, build up the hull superstructure and place an open turret from either a SdKfz 222 or SdKfz 234/1.
 

Travis7401

Douglass Tagg
Community Liaison
Worst says: The 38 (t) was one of the best pre-war tanks and the Hetzer was an excellent tank destroyer. When I was still reenacting one of the German units had a restored Hetzer that they would bring out a couple of times a year.
 

Travis7401

Douglass Tagg
Community Liaison
Pavel says: I can't wait until Travis goes full Hachiko and gives his army 99 ratings in everything, dresses them in pink camo, and invents backstories for half his squad
 

Travis7401

Douglass Tagg
Community Liaison
Travis says: Kella and pavel really spoiled my intended plot line.

Kella says: Hachiko has apparently exploited the 4th dimension to give himself infinite amount of time to do this shit, so you can just outsource all the seedy stuff to him and get on with smashing the Allies.

Pavel says: Taco Bell's XTREME Cool Ranch Doritos Breakfast Chalupas were actually invented during the Manhattan Project, and have been shown to open tears in the time-space continuum.

g8r, find me a 4-hour youtube on this
 

Travis7401

Douglass Tagg
Community Liaison
Turn 6

On the Northern front, nothing too eventful happened in Turn 6. I continued to bombard the entrenched troops in Poznan. After another turn of Bombardment, I should be able to destroy them or at least make them retreat from the city. I've also spotted a Polish TKS tank hanging out, but based on my experience with them on the Southern front, I'm not too worried about it.

Here is what the Northern front looked like at the end of Turn 6:
Image has been scaled down 41% (1143x643). Click this bar to view original image (1920x1080). Click image to open in new window.
12333584154_5f46aa408c_o.jpg


On the Southern front, I finished destroying the counter attack and moved the AT gun forward to secure the RR station. The group that I sent North to secure the airfield was successful, so I sent scouts on up the road further to see if I can continue the breakthrough in this are.

Here is what the Southern front looked like at the end of Turn 6:
Image has been scaled down 41% (1143x643). Click this bar to view original image (1920x1080). Click image to open in new window.
12333292623_c10f356243_o.jpg
 

Travis7401

Douglass Tagg
Community Liaison
Turn 7

This was a pretty decisive turn for the battle in general. In the North, I was able to seize Poznan, but did lose a good number of my infantry. I'll have to let them sit out next turn to gather reinforcements and resupply. The scouting contingent of my Southern group has also arrived to join up with my Northern group. They found Wreznia unoccupied and captured it. With that bridge at Wreznia secured, I've opened a nice approach for a combination attack on Konin

Here is what the Northern front looked like at the end of turn 7:
Image has been scaled down 41% (1143x643). Click this bar to view original image (1920x1080). Click image to open in new window.
12333136175_e9824e79df_o.jpg


In the south, the troops who captured the airfield were able to sit this turn out and were sent reinforcement and resupply. Next turn I'll send them up the road to Wreznia to help join the eventual attack on Konin. I moved to take the southernmost airfield, but found it occupied by AA and a fighter plane. I moved my Arty up in a truck to support an infantry assault on the AA gun in the next couple of turns. I left the AT gun behind to guard the RR crossing from any possible counter attacks. Mostly it just doesn't have a lot of offensive use, so I'm leaving it behind in a place where I think it has the highest chance of being useful.

Here is what the Southern front looked like at the end of turn 7:
Image has been scaled down 41% (1143x643). Click this bar to view original image (1920x1080). Click image to open in new window.
12333136845_11f79edea4_o.jpg


I'm now half through the allotted 14 turns, and things are still looking really good. At this point, I've captured 5 objectives and have 2 cities and 2 airfields left to take. I'm within striking distance of a couple of those objectives in the next few turns. Depending on how heavily Konin and Kaliz are guarded, I might be able to finish the mission with a decisive victory and time to spare.
 

Travis7401

Douglass Tagg
Community Liaison
Turn 8

On the Northern front, I pushed through from Poznan and Wreznia to surround the polish TKS tank and was able to destroy it. The computer flew their last remaining plane up to attack one of my stukas last turn, so I surrounded it with my BF109 and fighter bomber and did some damage. I should be able to destroy it next turn. With the TKS tank destroyed, I pushed forward to scout how heavily Konin is guarded. I found entrenched infantry with artillery support. I'll have to handle or suppress the artillery before I hope to dislodge the infantry. Nothing too challenging, but it will take a few turns if I'm going to avoid excessive losses.

Here is what the Northern front looked like at the end of Turn 8:
Image has been scaled down 41% (1143x643). Click this bar to view original image (1920x1080). Click image to open in new window.
12333579234_662c36a6f3_o.jpg


In the south, I destroyed the AA guarding the Southern airfield with an infantry attack supported by artillery. I moved forward to scout the defenses around Kalisz and found it guarded by infantry and 2 anti tank units. I'll have to move my own infantry and artillery forward in order to take them out.

My troops that secured the middle airfield are now fully reinforced and resupplied and headed back to the front. I'll have them available to throw extra weight into the attack on either remaining city.

Here is what the Southern front looked like at the end of Turn 8:
Image has been scaled down 41% (1143x643). Click this bar to view original image (1920x1080). Click image to open in new window.
12333285983_3834285807_o.jpg
 

Travis7401

Douglass Tagg
Community Liaison
Turn 9


Turn 9 was pretty uneventful in the North. The computer decided to move one of the AT guns guarding Kalisz back to help guard Konin. I worked on the remaining polish plane, but was not able to fully destroy it. I hammered away at the artillery and knocked it down to 5 strength. Over the next couple of turns I'll surround Konin and attempt to take it out with few casualties.

Here is what the Northern front looked like at the end of turn 9:
Image has been scaled down 41% (1143x643). Click this bar to view original image (1920x1080). Click image to open in new window.
12333575164_97440aea75_o.jpg


In the South, I sent dual stuka attacks at the entrenched infantry and then followed up with a tank attack since they were suppressed and knocked them down to 5 strength. I should be able to destroy them next turn when my arty and infantry arrive.

Here is what the Southern front looked like at the end of Turn 9:
Image has been scaled down 41% (1143x643). Click this bar to view original image (1920x1080). Click image to open in new window.
12333127495_7d2cdd7d38_o.jpg


Without any special surprises or weird stuff happening, I should be able to secure both objectives within a couple of turns. The first mission in a campaign is often pretty easy, as it functions as transition from the tutorials to actual gameplay. I'm hoping to complete the mission without the loss of a core unit and without having to spend much on reinforcements. My prestige is well over a thousand already, which will leave me money for buying new units or upgrading existing units before the next battle.
 

Travis7401

Douglass Tagg
Community Liaison
Turn 10

In the North, I destroyed the artillery helping to guard Konin and continued to bomb the troops in Konin as well. I also finished destroying the pesky polish fighter plane. I should be able to take Konin next turn after I can surround the city and bombard the troops a few more times.

Here's what the North looked like at the end of Turn 10:
Image has been scaled down 41% (1143x643). Click this bar to view original image (1920x1080). Click image to open in new window.
12333281703_b0c571b539_o.jpg


In the South, I smashed the troops guarding Kalisz down to 1 strength point remaining. With artillery support in place, I'll be able to take that for sure next turn.

Here is what the South looked like at the end of turn 10:
Image has been scaled down 41% (1143x643). Click this bar to view original image (1920x1080). Click image to open in new window.
12333277813_942aae5861_o.jpg
 

Travis7401

Douglass Tagg
Community Liaison
Turn 11

In turn 11, I captured Kalisz and destroyed both AT guns. I decided to hold off on my assault of Konin until I could bring my artillery forward to help out with suppression. With all of my forces together at this point, I was able to capture a screenshot with everyone in it. I have Konin surrounded and artillery and air support available, so I should be able to take it for sure next turn.

Here's what the battle looked like at the end of Turn 11:
Image has been scaled down 41% (1143x643). Click this bar to view original image (1920x1080). Click image to open in new window.
12417415075_0747ee412b_o.jpg
 

Travis7401

Douglass Tagg
Community Liaison
Turn 12 and Summary of Battle of Poznan

In turn 12, I brought my artillery and air power down on Konin and was able to destroy the infantry guarding the city and take the objective. With near full suppression on the troops in Konin, I was able to take the city with limited casualties. When I press the end of turn button I will have completed the mission, with 2 turns to spare, and a decisive victory.

Here is what the end of the battle looked like:
Image has been scaled down 41% (1143x643). Click this bar to view original image (1920x1080). Click image to open in new window.
12417902054_5185c864cd_o.jpg


After a review of the individual unit statistics for the battle, I gave the final city capture to the most successful ground unit on the field. This Panzer 1a accounted for the near single handed destruction of Artillery guarding Konin and ended up killing 20 units for only 1 unit lost.
Image has been scaled down 41% (1143x643). Click this bar to view original image (1920x1080). Click image to open in new window.
12417414405_6fa8b78d95_o.jpg


Overall, the battle was pretty easy, as might be expected in the first scenario of a campaign, but I was a little surprised at how light the resistance was around the two major cities. I didn't encounter a single city that was fortified with both artillery and AA. I'm sure things will get more difficult as I move forward, but for the first scenario I didn't suffer the loss of a single core unit and I was able to rack up a fair amount of prestige for upgrades.
 

Travis7401

Douglass Tagg
Community Liaison
Mystique of the Sturmpanzer 1

Bundesarchiv_Bild_101I-216-0406-37%2C_Russland%2C_getarnter_Panzer_I_B_mit_I.G._33.jpg


Quote:From Wikipedia:

The 15 cm sIG 33 (Sf) auf Panzerkampfwagen I Ausf B (sometimes referred to as the Sturmpanzer I Bison was a German self-propelled heavy infantry gun used during World War II.

The Invasion of Poland had shown that the towed sIG 33 guns assigned to the infantry gun companies of the motorized infantry regiments had difficulties keeping up with the tanks during combat. The easiest solution was to modify a spare tank chassis to carry it into battle. A sIG 33 was mounted on the chassis of the Panzer I Ausf. B, complete with carriage and wheels, in place of the turret and superstructure. Plates 13 millimetres (0.51 in) thick were used to form a tall, open-topped fighting compartment on the forward part of the hull. This protected little more than the gun and the gunner himself from small arms fire and shell fragments, the loaders were completely exposed. The rearmost section of armor was hinged to ease reloading.

There was no room to stow any ammunition so it had to be carried by a separate vehicle. When mounted, the sIG 33 had a total 25° of traverse and could elevate from -4° to +75°. It used a Rblf36 sight. The chassis was overloaded and breakdowns were frequent. The vehicle's extreme height and lack of on-board ammunition were severe tactical drawbacks.

Thirty-eight were produced in February 1940 by Alkett. Thirty-six of these were organized into independent schwere Infanteriegeschütz-Kompanie ("Self-propelled Heavy Infantry Gun Companies"); mot.S. Numbers 701-706 and these were assigned to the 1st, 2nd, 5th, 7th, 9th, and 10th Panzer Divisions in the Battle of France as well as Operation Barbarossa, (the invasion of the Soviet Union). The 705th and 706th were destroyed at this time, belonging to the 7th and 10th Panzer Divisions respectively. Of the remaining companies, only the 701st participated in the opening stages of the subsequent Case Blue in 1942, although it, and its parent 9th Panzer Division, were transferred to Army Group Center by the end of the summer of 1942. The last reference to them is with the 704th Company of the 5th Panzer Division during the middle of 1943.
 

Travis7401

Douglass Tagg
Community Liaison
Scenario 2: Battle of the Danzig Corridor

Here is the description of Scenario #2
Image has been scaled down 41% (1143x643). Click this bar to view original image (1920x1080). Click image to open in new window.
12419134734_a4a56fdd2e_o.jpg


Here is a highlighted strategy map of my basic plan at the start of the scenario:
Image has been scaled down 14% (1143x1305). Click this bar to view original image (1314x1500). Click image to open in new window.
12419751133_307f78bfba_o.jpg


The Vistula River basically splits the map. In Panzer Corps, you have to be careful with rivers because your units can only cross them effectively at bridges. If you try to cross where there isn't a bridge, your unit essentially must spend a turn at the river hex, where it is extra vulnerable to being attacked. I can't remember what the exact modifier is, but if you leave a unit in a river hex, they can get absolutely smashed by inferior units. That makes large rivers like this pretty easy to defend by placing units on the bridges and then giving them artillery support.

In order to avoid getting bogged down at the various bridges, I plan to attempt a double envelopment by sending Auxiliary group and Panzer Group A along the north and south flanks, respectively, to attempt to gain access to the East side of the Vistula River as soon as possible. This way I can destroy any artillery support or whatever from behind rather than attempting to fight a siege at each of the bridges/towns. I'll take auxiliary forces to the town of Gruziadz and hope they can fight their way to the East bank quickly and then strike South into the heart of the enemy rear area. Panzer Group A will move toward the South Bridge and Wloclawek and scout both bridges before attempting a breakthrough at the most lightly guarded bridge. They will then storm North through the enemy rear area and hopefully be able to meet with the auxiliary forces near the town of Rypin.

While the double envelopment is hopefully working, Army Group B will occupy the front of the Polish defenses with a siege style assault using both Artillery pieces. I'll direct this group at the town of Bydyoszcz, and hopefully by the time they've captured that town, I'll have broken through to the East side of the Vistula river with my other forces and started to dismantle the remaining enemy forces from the rear.

In order to achieve a marginal victory, I must take 3/6 victory objectives. In order to achieve a decisive victory, I must take all 6 victory objectives. Like the last scenario, I have 14 turns to capture the objectives. I start much closer to the objectives in this scenario and the added complication of the Vistula River should make this more difficult. I was only able to deploy 15 core units, so one of the infantry units in Panzer Group B was left in reserve at the start of the battle. If I lose a core unit during the battle, I can send them in.

If my double envelopment strategy goes poorly (double envelopment is always risky) my fallback plan is to capture the three objectives that don't actually require me to cross the Vistula River (Bydyozsz, South Bridge, and Wloclawek)
 

Travis7401

Douglass Tagg
Community Liaison
Danzig Corridor: Turns 1-3

I tried to play through pretty fast in order to keep the total run time down to a reasonable level, so I was making some hasty moves/decisions at times and I definitely regretted a few of them, lol.

Here is the video for the first 3 turns of the scenario:


During the first turn I flew my planes over a couple of cities (cities are almost always defended) and was surprised to see no troops.... but then I moved a tank up and was ambushed by troops in the city, lol. I forgot to check the weather, which was raining/overcast. My planes couldn't spot anything in that first turn. I was fortunate to only be ambushed by a half strength cavalry unit. Otherwise Turn 1 was pretty uneventful as I simply maneuvered my troops around

In turn 2, I bypassed the city defended by the cavalry unit with Group A and decided to take the city with the half strength infantry unit, so that I could move my tanks further forward. By the end of my turn, I had all of my tanks and the mobile artillery over halfway to the South Bridge/Wloclawek decision point. My planes positioned over the South bridge spotted infantry and supporting artillery. Group B was close enough to the half strength cavalry unit that I figured I'd just destroy them while I was passing by. I hammered them with artillery and then destroyed them with a tank attack. The auxiliary units also fared well in turn 2, as I was able to mount an artillery supported infantry assault which destroyed the half strength infantry force guarding Grudziadz. With the bridge at Grudziadz taken, The aux force portion of the double envelopment tactic looks like it should work well.

Turn 3 was relatively uneventful. I moved Group A forward and decided that Wloclawek looked easier to take than the Southern Bridge. I set up a tank screen to isolate the town from reinforcements while I moved forward my infantry and artillery support. I made a mistake here by leaving my armored car recon unit too far away from my artillery. It is important to protect vulnerable units with artillery by making sure they are directly adjacent to a friendly artillery piece. Artillery can be used for defensive fire support for any directly adjacent units. This defensive fire support is often enough to keep the computer from attacking supported units (or to hammer them with heavy losses if they do attack). This costly mistake will be apparent in the second video that I'll post tomorrow morning....

Panzer group B moved slowly forward toward Bydyoszcz without encountering any opposition. The auxiliary group partially crossed the Vistula River and is now poised for a breakthrough into the enemy rear.
 

Travis7401

Douglass Tagg
Community Liaison
Danzig Corridor Scenario: Turns 4-7


As you watch the CPU's turn at the beginning of the video, you see how my mistake of not providing artillery protection for the recon unit bites me. A polish heavy tank rushes forward and smashes my recon unit down to 3 strength, and a polish TKS tank rushes forward to finish it off. That quickly I lose my first core unit of the campaign.
Sad.png


In Turn 4, I re-organize and resupply Panzer Group A because it looks like they are going to be the focus of a Polish counter attack. I set my arty up to cover 2 tanks and one infantry unit. My third tank is not covered, but is on the far southern flank where only one unit can get to it. I use my stukas to destroy a cavalry unit and hammer the artillery guarding the Southern Bridge before flying them back toward the airfield to spend the next turn doing resupply. This portion of the envelopment will be stalled while I fight off the counter attack.

In Turn 4 I also moved Panzer group B up to start the siege on Bydyoszcz. They left their artillery unguarded, so I rushed forward with my recon unit and hit it. This is a bit risky considering what happened to my other recon unit last turn, but when I see open unguarded artillery it is important to strike. I also managed to get all of my Aux group on the East bank of the Vistula River, so at least this half of the envelopment is going well.

During the computer's turn, my recon unit with Panzer group B gets smashed down to 2 units, but manages to retreat. I'll have to be more careful in the future, lol

In Turn 5, I fight off some of the counterattack in the Panzer Group A area and send my planes back to refuel. I consider attacking the Polish tanks, but opt to play defensive until my stukas are refueled and can rejoin the attack next turn. With Panzer Group B, I spot the AT gun who has moved into a vulnerable river hex. I smash it with both artillery units and then destroy it with my infantry. This allows me to fully reinforce my armored car since there are no longer any enemy units adjacent. In the North, I continue to move my Aux units forward with artillery support and spot some enemy units. I'll begin attacking them next turn.

During turn 6 I found my stuka's don't quite have enough range to make it back into the fight, but my BF109 has just enough to make it to the Polish heavy tank and destroy a couple units. I bombard it with my artillery as well, but don't get the results I want. I did manage to capture Wloclawek with my infantry this turn and move my arty up to support them. I also managed to destroy the polish TKS tank. I still have to deal with the polish heavy tank but my stukas are back and I'm poised for a breakthrough at the Wloclawek bridge. With Group B, I managed to destroy a TKS light tank and the artillery unit guarding Bydyoszcz. Unfortunately, I had no infantry units capable of movement and wasn't able to capture it. My aux unit moved forward and destroyed the infantry guarding a non-objective city, and opened up the rear area for further exploitation.

During the CPU's turn, they move a TKS light tank into Bydoyoszcz (shouldn't be a problem) and start some sort of horse charge on Panzer Group A, lol.

In Turn 7, Panzer Group B forces the tank guarding Bydoszcz to retreat and I rush my infantry in to occupy it. Panzer Group A has even more success. With double air attacks on the heavy tank, I'm able to move a tank forward and destroy it without any losses. This was the only unit that had me really worried. I also was able to destroy the AT unit guarding the Wloclawek bridge and move my infantry forward to occupy it. There are still some horses running around, but I should be able to make quick work of them. The last part of Turn 7 was cut off but will be continued tomorrow on the next video.
 

Travis7401

Douglass Tagg
Community Liaison
The Mystique of Danzig


Quote:From Wikipedia

Danzig is an American heavy metal band, formed in 1987 in Lodi, New Jersey. The band is the musical outlet for singer/songwriter Glenn Danzig, preceded by the horror punk bands the Misfits and Samhain. They play in a bluesy doom-driven heavy metal style influenced by the early sound of Black Sabbath.

Beginnings (1986–1987)
On July 14, 1986, Samhain performed at The Ritz in New York in what was to be their final show. In attendance was Rick Rubin, who was scouting for potential bands to sign to his record label, Def American. Rubin at first wished only to sign Danzig, with the intent of making him the vocalist for a hard rock supergroup that Rubin envisioned. However, Danzig refused to sign to Rubin's label without Samhain's bassist Eerie Von. In 1987, he added John Christ on guitar and Chuck Biscuits (ex-Black Flag) on drums. To reflect the change in musical direction and avoid having to start anew after future lineup changes, Glenn, on Rubin's advice, changed the name of Samhain to his surname, Danzig.

"Classic" original lineup-era (1987–1994)
In 1988, the band released its first album on Def American (later renamed to American Recordings).[2]
In 1990, Danzig released its second album, Danzig II: Lucifuge. By 1992, Rubin's involvement with the band had waned. Danzig himself took credit for co-producing the third album, Danzig III: How the Gods Kill. The following year the band released the Thrall: Demonsweatlive EP, which contained several live tracks from the band's 1992 Halloween show as well as three new studio tracks. The live version of "Mother," a song from the first album, became popular on hard rock radio stations. A new version of the "Mother" music video was created using live footage, and the video became a hit on MTV as well.

On October 4, 1994, Danzig 4 was released. The album sold well, but did not contain a hit on par with the "Mother" single. The album's second single, "Cantspeak", was also a staple in MTV's rotation, but unlike "Mother" failed to appear on the Billboard Hot 100. "Cantspeak" is the band's only single other than "Mother" to chart on Billboard. Amid accusations of unpaid royalties and broken promises, Danzig's relationship with Rubin deteriorated, and the band left the record label.

Around this time, the band's lineup began to dissolve as well. First, Chuck Biscuits left the band in the summer of 1994 due to royalty disagreements. According to a special issue of Kerrang!, former Nirvana drummer Dave Grohl turned down an approach by the band. Biscuits was replaced by Joey Castillo, who made his first public appearance as a member of Danzig at an in-store signing the day of the fourth album's release. Coincidentally, Castillo would later replace Grohl in Queens of the Stone Age. Though the band had toured successfully with its new drummer during the fall and winter of 1994-95, by the spring of 1995 Danzig was actively seeking a new guitarist, with Pepper Keenan and Dez Cadena considered possible replacements. John Christ and Eerie Von resigned on July 5, 1995.
Post-original lineup-era (1995–1999)

In October 1996, Danzig 5: Blackacidevil was released. The album was mostly a solo effort by Danzig, although Jerry Cantrell of Alice in Chains played lead guitar on three of the album's tracks. Joey Castillo played drums, the sole member still in the band from the 4p Tour. Castillo would record on two more Danzig albums, making him the longest-standing member outside of the original lineup.

For the next few years, Danzig was tied up in a legal battle with Rubin over the rights to unreleased material the band recorded for American Recordings. In November 1999, Danzig 6:66 Satan's Child was released. A long-planned Samhain box set was also released, followed by a Samhain reunion tour. Samhain opened for Danzig for six weeks during the tour and consisted of Steve Zing and London May switching between bass and drums.
Later years (2000–2005)

By 2000, Danzig's line up had stabilized with the addition of guitarist Todd Youth and bassist Howie Pyro, both veterans of the New York City punk scene. In 2002, this line up released the album Danzig 777: I Luciferi. In 2004, Danzig released their eighth studio album, Circle of Snakes, with the line up featuring Tommy Victor of Prong on guitar, who had toured as a member of Danzig years earlier.
Soon after the album's release, Danzig undertook the Blackest of the Black tour across the United States, replacing Circle of Snakes drummer Bevan Davies with Johnny Kelly (of Type O Negative).
Recent activity (2006–present)

Throughout 2006, Glenn Danzig stated in several interviews that he had grown tired of the touring cycle, and did not expect to partake in any more large scale tours. Instead, Danzig would go on small, localized tours, such as the ten west coast dates they played for the 2006 Blackest of the Black tour. This tour debuted Kenny Hickey (of Type O Negative) as the band's new guitarist, while the East Coast dates saw the addition of former Samhain member, Steve Zing on bass.

In October 2006, Glenn Danzig released Black Aria II, the follow-up to his solo classical album, Black Aria. Black Aria was re-released by Evilive in May 2007. He spent the rest of the year completing the production and packaging of The Lost Tracks of Danzig, a double CD containing twenty-six unreleased songs that span the entire Danzig catalog, which was released on July 10, 2007. Danzig has also stated that he plans to record a dark blues album with either Jerry Cantrell or Hank Williams III.

In August 2008, Glenn Danzig announced that Danzig (the band) would do a 20th anniversary tour, celebrating the release of their self-titled debut album. This was the band's first full US tour in three years, which also included stops in Canada and Mexico. Also asked in August 2008 if the ninth Danzig album was planned, Glenn Danzig replied:
“ I have been in the studio here and there working on new songs but don't know when they will come out. I was thinking of putting one up on the Danzig site so the fans could check it out. Even thought about doing one on this tour. ”
— Glenn Danzig, August 2008

On December 26, 2009, Danzig performed at the Starland Ballroom in New Jersey. The show was notable for featuring a special appearance by Michale Graves who, along with Doyle and Dr. Chud, performed several songs by the reformed version of the Misfits.

On March 10, 2010, a Danzig lyric book was released, titled Hidden Lyrics of the Left Hand. The book contains unreleased song lyrics combined with illustrations by Simon Bisley.

Danzig released Deth Red Sabaoth, their ninth studio album, on June 22, 2010.[9] It is the band's first proper studio album in six years, since 2004's Circle of Snakes. Both Tommy Victor and Johnny Kelly appeared on the record.

In 2009, movie director Todd Phillips chose Danzig's song "Thirteen" to open his film The Hangover. Danzig later recorded a new song, "Black Hell", to appear in the 2011 sequel, The Hangover: Part II.

In January 2011, Danzig were announced for the 2011 Download Festival at Donington Park, England, alongside bands including Rob Zombie, Alice Cooper, and System of a Down. On the first day of the festival, Danzig headlined the Pepsi Max stage. On June 12, 2011, Danzig played at the Nova Rock Festival.
On October 25, 2011, a greatest hits album entitled The Essential Danzig was to be released through Sony BMG. However, as of December 2011, this has yet to happen, nor have details of the release been given.

October 2011 also saw a rare string of reunion shows called the "Danzig Legacy" tour. The shows consisted of a Danzig mini set, followed by a Samhain mini set, a set of Danzig and Doyle performing Misfits songs, and then ending with three Danzig songs and the performance of "Skulls".

In May 2012, Danzig released the song "Devil's Angels", the theme from the 1967 film of the same name, from his as yet untitled covers album: “I've wanted to record this song since 1979 and this is exactly the same arrangement I had for it back then, so it pretty much sounds like that late 70s style of mine. I'm really happy with the way it turned out, it actually came out much better than I had hoped it would. We're going to be playing it live on these upcoming shows.”

In April 2013, Glenn Danzig told Full Metal Jackie that he will begin work on new Danzig material with Tommy Victor and Johnny Kelly after the 25th anniversary tour.​

Osick is a mind reader, lol.
 

Travis7401

Douglass Tagg
Community Liaison
g8r's stance against the Military Industrial Complex and Lizard Person Digression.


gr8 says:

Mystique of Dwight Eisenhower


Mystique of Mystique:
he Mystique of Mystique (Part 1 of 3)

x-men_days_of_future_past_jennifer_lawrence_mystique_makeup.jpg


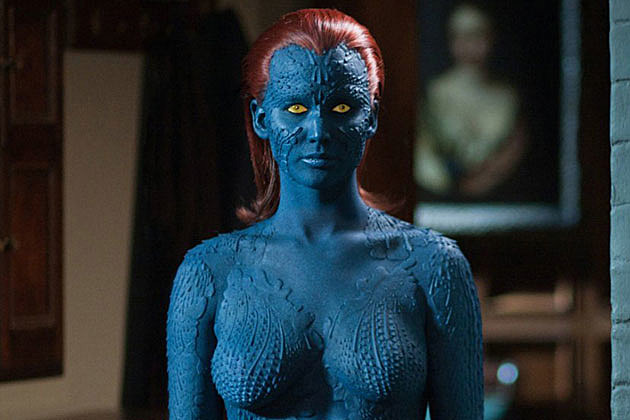
Quote:Mystique (Raven Darkhölme)[3] is a fictional character associated with the Marvel Comics' franchise X-Men. Created by artist David Cockrum and writer Chris Claremont, she first appeared in Ms. Marvel #16.[4]

Throughout most of her history, Mystique has been a supervillain, founding her own Brotherhood of Mutants and assassinating several important people involved in mutant affairs. Mystique herself is a mutant, a shapeshifter whose natural appearance includes blue skin and yellow eyes. At one point, she mentions that she is over 100 years old.[5] Mystique is the mother of the villain Graydon Creed, the X-Men hero Nightcrawler,[6] and adoptive mother of the heroine Rogue.[3] She is forced to abandon Nightcrawler, but raises Rogue for a number of years, and the two women have mixed feelings towards one another.[3]

Despite Mystique's history of crime, she works with the X-Men's Professor X in a short-lived series.[7] She is later voted straight into the X-Men.[8]

Mystique appears in five of the X-Men films: she was portrayed by actress Rebecca Romijn in the first three installments, while Jennifer Lawrence portrayed a younger version of the character in X-Men: First Class (in which Romijin has a cameo) and X-Men: Days of Future Past.[9] In 2009, Mystique was ranked as IGN's 18th Greatest Comic Book Villain of All Time.[10]

Destiny

Mystique's exact age remains unknown. Her earliest meeting with her lover Destiny occurred around "the dawn of the 20th century."[17]
Early espionage activities and contacts

The decades-long quest[clarification needed] of Mystique and Destiny apparently required them to travel constantly. They encountered Shadowcat and Rachel Summers, who had time traveled from the future to prevent a plot by Nazi agents Baron Wolfgang von Strucker and Geist, "Ghost", a member of Nazi intelligence, and their ally Amahl Farouk, Shadow King. The three conspired to question the rights of the British Monarch to the throne and then to replace him with Oswald Mosley of the British Fascist Party, a likely ally for Nazi Germany. Irene and Raven contacted an acquaintance of theirs, called Logan, to help the time travelers. Irene and Raven advised Shadowcat and Logan against proceeding in their contemplated assassination of Adolf Hitler and other prominent leaders and officials of the Nazi Party. Raven was laconic in only stating: "All of us have learned to kill, Logan. But more importantly, we have learned not to kill. And to know the difference."[volume & issue needed]

At some point, Raven reportedly lost contact with Irene. She managed to locate her working as an archivist in the Alamogordo nuclear research facilities in New Mexico. Raven was uncertain of Irene's motivation, but apparently trusted her enough not to press for answers.
Sabretooth

Raven meets Victor Creed, the man known as Sabretooth. At the time, she uses the identity of deceased German secret agent Leni Zauber. Both Leni and Victor had been assigned with the assassination of a scientist in East Berlin. Raven completes the mission in place of Leni, and then she and Victor have to hide in a safe location for a while. They became lovers, but she soon fakes her death in order to leave him.[18]

The result of this short-lived affair is reportedly the birth of Graydon Creed, her earliest known child. A number of stories report that soon after his birth, Raven gives him up for adoption. Others depict Mystique making arrangements for him from a distance. Graydon reportedly spends most of his childhood in a boarding school. Raven keeps track of his activities until he reaches adolescence. Being the child of two mutants, Graydon assumes he is a mutant himself. However, he eventually proves to be a Homo sapiens instead of a Homo superior. Raven is disappointed and soon abandons him. Graydon grows to hate his parents, and eventually extends his hatred to all mutants. He later becomes leader of the mutant-hating organization Friends of Humanity, and then a politician. Graydon, at the height of his political ascension, was assassinated by an unknown shooter.[19] The shooter was later revealed to be a time traveling version of Mystique, as part of a convoluted time paradox involving Jean Grey, Iceman, Toad, and Juggernaut.[20]
Nightcrawler

For several years Mystique was also reported to be the mother of Nightcrawler, but the exact events were uncertain. Much later another writer, Chuck Austen, eventually revealed that the father was a demonic-looking mutant from biblical times called Azazel.[volume & issue needed]

At that time, Raven is married to Baron Christian Wagner; older sources give his name as Count Eric Wagner, an affluent member of the German nobility. He proves to be a loving husband, but rather disappointing as a lover. His infertility adds to their marital problems. Raven starts using her shapeshifting powers in order to secretly have sexual encounters with others. She is apparently both seeking sexual satisfaction and attempting to conceive another child. She is eventually seduced by fellow mutant Azazel.

Azazel states that he is ruler of "an island nation off the coast of Bermuda: La Isla des Demonas," The Island of Demons. He is apparently able to disguise his appearance (although is not a shapeshifter like Mystique), and also has the power of teleportation. He is later revealed to also have the power of immortality and to be the father of an ancient race of mutants known as the Neyaphem, active since at least 2000 BC. His natural form is that of a young man with black hair, yellow eyes, red skin, and a pointed tail. He later claimed to have been posing as a demon and to have used many aliases: "Because I am Semihazah, Duma, Keriel, Mastema, Beliar, Gadreel, and Beelzebub. And most commonly called Satan." Many of these aliases have also been claimed by several notable true demons of the Marvel Universe.

Raven soon becomes pregnant. Her husband becomes suspicious and his own father suggests a blood test to verify whether the child is his. Mystique uses a dagger to murder him and then buries him. She eventually gives birth to a young boy with black hair, yellow eyes, blue skin, and a pointed tail. The locals consider the mother and child to be demons, and attempt to kill them. Mystique manages to escape but abandons her second known son. He is found and raised by Gypsy sorceress Margali Szardos and named Kurt Wagner.
Rogue

Mystique later becomes the adoptive mother of the girl Rogue, when she was just four years old. Rogue had run away from her home in rural Caldecott County, Mississippi. The girl was living alone in a wooded area, brandishing a shotgun and trusting no one, when Mystique found her. Destiny foresees that Rogue will be important to them and Mystique seeks her out, gains her trust, and takes her in. She and Destiny raise the girl over approximately a decade, and Mystique grows to be very protective of her.

Mystique had concealed her superhuman powers and criminal intentions so well over the years that, as Raven Darkhölme, she is able to rise rapidly through the United States Civil Service to the trusted position of Deputy Director of the Defense Advanced Research Projects Agency (DARPA) in the United States Department of Defense. This position gives her access to military secrets and to advanced weaponry, both of which she uses for her own criminal and subversive purposes.

In this position, she attempts the theft of the Centurion weaponry from S.H.I.E.L.D.[21] She also beat Ms. Marvel's lover Michael Barnett to death, and sought to kill Ms. Marvel.[22]

To help her in her criminal activities, Mystique organizes her own incarnation of the Brotherhood of Evil Mutants, which originally consisted of herself, Avalanche, the Blob, Destiny, and Pyro. This incarnation of the Brotherhood first gains notoriety when it attempts to assassinate Senator Robert Kelly, a notoriously anti-mutant politician. The X-Men battle the Brotherhood and thus thwart the assassination attempt, thereby averting a series of events which would have resulted in the death of most super-powered humans, and the subjugation of North America by the mutant-hunting robots, the Sentinels (as chronicled in the "Days of Future Past" storyline).[23] The Brotherhood later clashed with the X-Men on other occasions.

Rogue is trained by Mystique and eventually joins the Brotherhood. Her mutant power is the ability to absorb the psyche, memories, personality, strengths, and any skills or powers of whomever she touches. Rogue proves to be a powerful member of the team. She goes on many missions with the Brotherhood and, with her help, the team is almost able to defeat the Avengers.[24]

On a mission with the Avengers, Rogue fights Carol Danvers, Ms. Marvel. Rogue tries stealing Carol's powers, but Carol fights too hard and Rogue ends up absorbing Carol's memories and powers permanently, while Carol is left an empty shell. Professor Xavier later restores Carol's memories, but not the emotions that went with them. Rogue, meanwhile, feels like she is losing her mind, grappling with Danvers' psyche and at times not knowing which memories are really hers. Feeling like she is in danger of losing control of herself, Rogue runs away from home and seeks help from the X-Men, hoping that Professor X will be able to treat her. While the other X-Men are initially hesitant in accepting their former enemy, Xavier welcomes her and gives her a spot on the team.

Worried that Rogue has left because Xavier has brainwashed her, Mystique goes to rescue her, leading an attack on the X-Men. Rogue stops her, saying that she has left of her own free will. Mystique is doubtful and hurt, but Rogue ultimately convinces her by saying that Xavier was probably the only person who could help with her powers and give her a chance at a normal life, as she feared the absorbed personality of Carol Danvers would otherwise drive her insane. Mystique grudgingly agrees and lets Rogue stay with the X-Men. Though she remains close to Rogue, coming to help her at times, Mystique comes to resent Xavier.

Mystique is captured by Carol Danvers at the Pentagon at one point.[25] She leads the Brotherhood in clashes with Dazzler,[26] and leads the Brotherhood in battle with the X-Men as well.[27] Mystique later visits Forge, and protests Henry Peter Gyrich's use of Forge's neutralizer.[28]
Freedom Force

Later, anti-mutant sentiment among normal humans rises and the federal government launches its own covert anti-mutant program, Project Wideawake. Believing that the times have become too dangerous for the Brotherhood to continue its criminal activities, Mystique goes to Doctor Valerie Cooper, special assistant to the head of the National Security Council, and offers the Brotherhood's services to the government. Cooper agrees to convey the offer to the President on the condition that the Brotherhood passes a test she imposes: the capture of Magneto. The Brotherhood, now renamed Freedom Force, succeeds in bringing Magneto to the authorities, though only because he voluntarily surrenders to them so he can go on trial for his crimes and soon afterward officially enter the government's employ.[29]

In return for entering government service as Freedom Force's leader, Mystique and her team receive a presidential pardon for all criminal charges against them, but the pardon would be revoked if any member of Freedom Force were found committing a crime.

Mystique leads Freedom Force in capturing the Avengers on behalf of the federal government.[30] She clashes with X-Factor in seeking to arrest Rusty Collins.[31] With Freedom Force, she fights the X-Men in Dallas, and is present at the X-Men's apparent demise.[32] With Freedom Force, she battles Cyclops and Marvel Girl.[33] With Freedom Force she seeks to arrest Rusty Collins again, and battles the New Mutants.[34] She finally succeeds in capturing Collins as well as Skids.[35] She leads Freedom Force against the Reavers on Muir Island. On this particularly disastrous mission, Freedom Force loses two of its members, Stonewall and Mystique's lover Destiny.[36] The death of her lover leaves Mystique psychologically scarred, and she never truly recovers.

Mystique is later nearly killed by Dr. Valerie Cooper, who is under the Shadow King's mental control.[37] She then impersonates Dr. Valerie Cooper.[38] Mystique is eventually discovered impersonating Dr. Cooper, and saves Xavier's life by killing the Shadow King's human host, Jacob Reisz.[39] She finally reconciles with Rogue.[40] In time, she comes to terms with Destiny's death.[41] She teams with Spiral and Wolverine in thwarting Mojo's near-destruction of the universe.[42] Mystique later briefly stays as a guest at Xavier's mansion. She begins going insane, and leaves the mansion under the care of Forge.[43]
X-Factor

Mystique resurfaces several months later, in a failed attempt to kill Legion for his murdering of Destiny. Mystique has an implant put in her skull by Forge in order for the government to be able to keep track of her. She is then forced to become a member of the government-sponsored team X-Factor after being arrested for trying to blow up a dam. In truth, Mystique had been trying to save the dam, which the U.S. Government wanted to destroy it so that they could blame it on mutants. She joins coincidentally to the departure of X-Factor member Wolfsbane. Her membership leads to tension with her teammates when Sabretooth is added to the team months later as a sleeper agent, for the main purpose of killing Mystique before she could uncover the truth about the conspiracy she had discovered. She slowly develops a romantic relationship with team-leader Forge (though he later thought that she was just using him).[volume & issue needed]

Part of the conspiracy involves Mystique's son Graydon Creed running for President, under an anti-mutant platform.[volume & issue needed]


Travis says: That's definitely a lizard person.
 

Travis7401

Douglass Tagg
Community Liaison
Moar g8r because nutopia posts have a 15,000 word limit, lol.


MOar Mystique of Mystique: (Part 2/3)

At the same time, both Graydon and Mystique learn that her lover Destiny had married and had children during one of the couple's separations. Irene's children are now adults with their own children, one of which is a mutant. Graydon has the mutant teen savagely beaten by members of the Friends of Humanity, as a warning towards his mother. Mystique is furious and wants to kill her son, but stops when she is given a message that Graydon's backers want her to kill him and turn her son into a martyr.[volume & issue needed]

Mystique then seeks to save her son from being betrayed by his backers, but fails miserably. Graydon dies and his death ushers in a new wave of anti-mutant violence. Ultimately, Sabretooth acts on his orders to kill the members of X-Factor as "Operation Zero Tolerance" is activated. Even though she could have left her teammates to die, Mystique attacks Sabretooth, an act of intervention that distracts Sabretooth long enough to keep him from finishing off the already injured team. Mystique then flees the scene after arranging for the members of X-Factor to receive emergency medical treatment for the wounds Sabretooth inflicted.[volume & issue needed]

Mystique goes into hiding, taking the identity of the senator's wife Mallory Brickman, using her husband's influence to set the FBI on Sabretooth. She prevents Rogue from giving up her mutant powers and she continues her investigation of the U.S. Government over her son's death, leading to her aiding Toad and his most recent incarnation of the Brotherhood of Mutants on a mission to raid a government base. The mission fails thanks to Machine Man, who fights the Brotherhood and forces the team to flee. Mystique flees to Europe, at which point her life changes dramatically. While taking the form of a blonde haired woman during a trip to the beach, Mystique is confronted by a famous photographer who tells the mutant that he wants to make her the next big fashion model.[volume & issue needed]

Amused, Mystique accepts and quickly becomes the fashion industry's newest top model. Using her money, Mystique moves back to New York and into an expensive penthouse apartment. At peace, Mystique buys a telescope and uses it to take in her penthouse's view of New York. This proves to be a huge mistake, as a nearby building is being used by Skrulls loyal to Apocalypse to build the machinery needed for an upcoming scheme of the villains. When one of the Skrulls catches Mystique by her window with her telescope, they assume the worst and frame Mystique for the murder of a Japanese diplomat. With help from Shadowcat and Rogue, Mystique is cleared and leaves town. However, before she leaves, Shadowcat finds one of Destiny's diaries, left there by Destiny herself before she died.[volume & issue needed]
Breakdown

Mystique then reaches a breakthrough regarding her investigation of the U.S. conspiracy against mutant-kind, but fate causes Mystique to suffer a massive blow. While gaining the critical intelligence on the identity of those who were involved in her son's death and the attempt to kill her via Sabretooth, Mystique suddenly loses her powers while pretending to be a man in a busy office workplace.

Arrested, Mystique's life is torn apart as the U.S. Government acts on their intelligence regarding Mystique, and uses it to destroy all of the alternate identities that Mystique has established over the years and arrange for Mystique to be unable to access any of the money she and Destiny had hidden away over the years. This causes Mystique to lose any self-control she might once have had, as the loss of her powers and the loss of her freedom causes her to lash out at everyone around her. Most notably, Rogue feels the brunt of her mother's wrath as Rogue has no sympathy for Mystique's plight. The relationship sours most notably when Rogue refuses to tell Mystique that the X-Men are going to fight the High Evolutionary, who was responsible for depowering all mutants, in order to restore everyone's powers. The X-Men defeat Evolutionary and restore everyone's powers, allowing Mystique to escape jail.

Mystique is later sent back in time by the original X-Factor's sentient ship. Raven finds that she is destined to be part of a great time paradox, where she finds herself with a time delay weapon, which she is about to program to kill Graydon. Mystique is confused, because she remembers that she set up the weapon, but never got around to programming it. After some deliberation, she decides to activate the weapon to kill Graydon. Mystique's sanity is further damaged by the revelation that her lover and soulmate Destiny was one of the founding members of the anti-mutant conspiracy Mystique had dedicated countless years to fighting, and had willfully withheld medical treatment to mutant children that would have resulted in them not growing up deformed due to their mutations.

This led to Raven once again going mad, due to the futility of her mission to change the world for the better. Raven becomes nihilistically obsessed with death and genocide, as she reforms the Brotherhood of Evil Mutants for another assassination attempt on Senator Kelly, and kidnaps Moira MacTaggert and impersonates her in order to access her research on the Legacy Virus. While not the gifted scientist that Moira was, Mystique's insanity and experience with bio-terrorism allows her not only to use samples of Moira's Legacy Virus infected blood to create a biological weapon that would infect humans and not mutants, but most importantly, allows her to come up with a cure for the Legacy Virus after repeated readings of all of the doctor's research which, when filtered through Mystique's insane mind, results in her being able to pick up on insights that Moira had missed when researching.

The assassination attempt on Kelly ends in failure, when the mutant villain Pyro betrays his teammates to save Kelly's life. Mystique blows up MacTaggert's research facility, fatally injuring the doctor. Mystique then shoots Moira's foster daughter Wolfsbane with a prototype of Forge's neutralizer gun, depowering her.

Rogue arrives and confronts her mother. When Mystique reveals her plan to Rogue of using a modified form of the Legacy Virus on the humans, Rogue realizes that her mother is ill and tries to help her. Mystique pretends to accept Rogue's help before stabbing her in the gut.

As Mystique confronts the other X-Men, Rogue's healing factor revives her. Sneaking behind Mystique, Rogue uses the bone claws she had absorbed from Wolverine and stabs her in the back.

Mystique is hospitalized, where she tells the X-Men that Destiny had predicted a dark future for mutant-kind, and that the future Destiny foretold kept on unfolding despite all that Mystique had done to prevent it. She believes that the only way to save them is to get rid of the humans, for a planet of mutants might survive, while mutants divided against each other and with humanity shunning them as outcasts would be doomed.

Mystique is sent to prison, but quickly escapes. She then allies herself with Martinique Jason, the daughter of the original Mastermind, in an attempt to wrest control of the military organization known as the X-Corps from its founder, Banshee. Outfitted with a device that gives her the ability to generate an electrical charge, Mystique creates the identity of a supervillain named Surge and joins the X-Corps. While Mastermind's daughter mind-controls the other members of the organization, Mystique brings Banshee's organization down and slits his throat, leaving him in critical condition.
Double agent

Charles Xavier is later forced to make Mystique his secret agent, as his previous one, Prudence Leighton, has died and Mystique is the only one suitable enough to complete the missions. Xavier poses as Magneto to rescue Mystique from the Department of Homeland Security and from execution at the hands of Johny Kitano, Special Magistrate for Homo Superior crimes against humanity, and a mutant himself.[44]

At this time, Mystique claims that there is an imposter out to frame her, taking control over the Brotherhood and sending them on their recent missions (the assassination of Moira and the infiltration of X-Corps). Whether she is speaking the truth has not been revealed. The two never truly trust each other, but as long as Mystique completes the missions without killing anybody, Xavier keeps her safe from the authorities, who are out to execute her. Working with Xavier is Forge, with whom Mystique had a brief romance while she was in X-Factor.

One of Xavier's enemies, the Quiet Man, who is actually Prudence Leighton inhabiting the body of her assassin,[45] contacts Mystique and offers to give her an interference transmitter which would keep her safe from the authorities, the same type of device Xavier is using, if she killed Xavier. Creating a plan that would free her from both men, Mystique pretends to try killing Xavier while secretly working with the mutant thief Fantomex, after alerting Forge to stop her at the last moment. Her plan is to have the Quiet Man see this and believe that she really has attempted to kill Xavier and is still working for him. However, the other X-Men also believe that Mystique has tried killing Xavier and seek her out.[46]

Rogue manages to track her down. She disowns her adoptive mother, saying she has tried to forgive Mystique for stabbing her, but that this is too much. She goes on to say that Mystique isn't her mother, that she is a monster. Mystique tries apologizing to Rogue for how she has hurt her, but Rogue is distraught with rage and attacks her foster mother. Mystique manages to escape by blowing up the house and going through the window, changing her form to shield her fall.[46]

Mystique goes to the Quiet Man, who is planning on having her killed due to outliving her usefulness. After a battle, Mystique kills the Quiet Man, saves her former field-handler Shortpack, and discovers the Quiet Man's interference transmitter has been a fake all along. Later, Forge catches Mystique trying to steal his interference transmitter. After some angry words, he smashes it and tells her he never wants to see her again. The two share a sad goodbye kiss and Mystique leaves. After Mystique is gone, Forge realizes that she had already switched his transmitter for the fake one.[45]
Joining the X-Men

Mystique later infiltrates the X-Men, posing as a young girl named Foxx and joining Gambit's training squad, the Chevaliers.[47] She attempts to seduce Rogue's boyfriend Gambit to break them up so she can set her daughter up with a young mutant named Augustus, a man with whom she believes Rogue could be the happiest.[48]

Though severely tempted by "Foxx's" advances, Gambit resists. Mystique ultimately reveals herself to him, telling him that she is trying to relieve the tension between him and Rogue (because of the two being unable to touch due to her ability to absorb someone's essence upon skin-to-skin contact). Mystique then metamorphoses into Rogue and tells Gambit that he would not be cheating on Rogue if he had sex with her in Rogue's form.[49]

When the telepath Emma Frost discovers who Foxx really is, the X-Men confront Mystique. Mystique tells them that she had been lonely and wants to join the X-Men. Emma also discovers that Gambit had known who Foxx really was all along, and a furious Rogue believes the two have been having an affair. Mystique would not reveal if she and Gambit did anything, but tells Rogue that if he truly loves her he would not have been tempted, and that she deserves better than him. Gambit denies anything had happened.[50]

Later, the X-Men vote and decide to have Mystique join them on a probationary status (though Rogue is one of the ones who vote against her joining). Meanwhile, Nightcrawler asks her to leave for a while regardless of the vote, saying that he needs more time adjusting to the idea of her being a member first. Mystique ultimately agrees and leaves.[51] However, after M-Day, she joins the X-Men and brings Augustus (Pulse) along with her. Both have been crucial in the latest downfall of Apocalypse. Rogue believes that Mystique's transformation is yet another act.[volume & issue needed]
Marauders
 

Travis7401

Douglass Tagg
Community Liaison
Jesus Christ I love you, g8r:

Mystique of Mystique Part 3/3

Mystique is a great assistance in the battle against the Children of the Vault, killing Sangre by pumping thermite bullets into his aquatic body. After the Hecatomb battle on Providence, Rogue's team (sans Cable) return to Rogue's former childhood home in Caldecott County, Mississippi, which Mystique owns for some downtime. Mystique consummates her flirtation with Iceman, and even alerts the X-Men, who come to treat Rogue's illness, that there are intruders in the area. Only after Lady Mastermind drops her illusions do the X-Men realize that it is an all-out attack, and that both Lady Mastermind and Omega Sentinel (the latter being possessed by Malice) have defected sides. During the Marauders' initial ambush, Mystique prevents Scalphunter from shooting Rogue. She then reveals herself as a traitor as well when she shoots her adopted daughter and, standing over her body, orders the remaining Marauders to kill the X-Men.
Messiah Complex

Mystique remains with the Marauders during the hunt for the first new mutant baby, but is revealed to have murdered Sinister in a plot involving the baby and Rogue's killing touch. She also appears to be working with Gambit, who, like her, has plenty of ulterior motives to want to betray Mister Sinister. When Sinister approaches Mystique as she is with the comatose Rogue, Mystique shoves Sinister onto Rogue, killing him through fatal skin-to-skin contact. Then, in keeping with the words of the Destiny Diaries, she touches the baby's face to Rogue's, believing that this will heal her foster daughter. While the baby is not affected by Rogue's power, to Mystique's surprise, Rogue does not awaken as the Destiny Diaries predicted. Believing their plan to have failed, Mystique and Gambit cry at Rogue's bedside.

As they grieve, Rogue finally awakens. After hearing all that Mystique has done, and sick of her manipulations, Rogue says she's tired of people getting hurt whenever Mystique is around, and tries to kill her with her touch. When Mystique is merely rendered unconscious, Rogue discovers that the baby's powers have restored her own to normal. The baby's touch has purged her of the Strain 88 virus and all the residual psyches she had absorbed over her life, including Hecatomb. However, she now has the consciousness and the memories of the one person she wants nothing more to do with: Mystique. Sickened by what she has absorbed, Rogue tells Gambit that she needs to be alone, and leaves.
Get Mystique

Mystique is the focus of the next Wolverine story arc, appropriately titled "Get Mystique."[52] The story begins with a brief flashback revealing that Logan and Mystique first met in Mexico in 1921. Back in the present day, Wolverine is in the Middle East tracking Mystique, presumably to kill her for betraying the X-Men in Messiah Complex. Mystique evades Logan by blowing up a Mosque in Tehran, then travels over the border to Afghanistan. There she impersonates Wolverine and kills a local village girl, tricking the villagers into going after Wolverine.[53] Mystique does not appear to be suffering from any lasting effects from being touched by Rogue. It is hinted at that Mystique's recent betrayal is not the only reason Logan is out to kill her, as they apparently have a common history of friendship, love, and ultimately, betrayal.[54] After a heated fight, Wolverine manages to wound Mystique, but he chooses to deny her the mercy blow. Instead, he drops a gun and leaves in the sunset, leaving Mystique to scream and curse behind him.[55]
Manifest Destiny
Mystique shows up again, posing as Bobby Drake's ex-girlfriend Opal Tanaka. It is not explained how she survived her battle with Wolverine. She sets off a bomb inside of Bobby's Blackbird before shooting him and kicking him out of the plane.[56] Later, she follows Iceman to the hospital and injects him with a fatal dose of a toxin created by Mister Sinister. Hospital staff try to get to Iceman, but they are held back by Mystique while Iceman expels the toxin from his system. Afterward, Mystique attacks Iceman in a truck and sets the truck ablaze with Iceman in it. Iceman steps out of the fire unharmed and disarms and immobilizes Mystique, but she escapes moments later after turning her body into her child form. In the final issue of Manifest Destiny, Mystique impersonates Iceman and stands on top of the Golden Gate bridge threatening to blow it up. Iceman arrives and discovers the reason for Mystique doing this is Wolverine telling her that she will die alone. After a heated conversation, Iceman freezes the bomb, Mystique punches him and jumps off the bridge into the water. Her body is not found, but Iceman tells Cyclops and Hank McCoy that he knows that she is not dead and thanks her for what she did for him.[57]
Utopia and Dark X-Men
Mystique is later revealed to be a part of Norman Osborn's Dark X-Men, posing as Professor Charles Xavier for P.R. purposes. Osborn has her injected with nanites and kept on a short leash; should she try anything, Osborn would turn her into a human bomb.[58] After the defection of Emma Frost, Namor, and Cloak and Dagger, Mystique begins leading the remaining members of the team (Mimic, Dark Beast, and Omega) under the public guise of Jean Grey, as no one could prove Jean had actually died, but mainly to hurt those who had caused her great harm.[59] A mission arranged by Osborn has Mystique (in her Jean Grey guise) facing a resurrected Nate Grey.[60]
[/quote]
 

Travis7401

Douglass Tagg
Community Liaison
Alright. That's officially all of the shit from oldtopia copied over to newtopia. I've got 2 more vids already uploaded to youterb, so I should be able to post them sometime later today to finish out Scenario 2.

For Scenario 3 I'll do live commentating on my vids, with cows mooing.
 

Travis7401

Douglass Tagg
Community Liaison
Scenario 2 - Danzig Corridor
Turns 8-10


In Turn 8, the air support for Panzer Group A wiped out the Artillery unit helping to guard the Southern Bridge. My infantry unit guarding the bridge near wloclawek took some heavy damage during the CPU turn, so I pulled them back and replaced them with a tank. Just setting up for a breakthrough against the horses next turn. The aux force in the North captured a non-objective city and started the siege on the North Rail Bridge, nearly wiping the defending poles out in a single turn. Panzer group B continued to make progress against the units surrounding Bydyoszcz.

In Turn 9 the horse slaughter commenced, with both Panzer Group A and Panzer Group B hammering Cavalry units. The aux unit managed to take the Northern Railroad bridge and the Aux unit and Panzer Group B are now nearly connected, as they managed to double team to destroy a polish TKS tank.

In Turn 10 The Aux force and Panzer Group B connect to form a united front in the North. Panzer Group A smashes the remaining enemy cavalry units in the South with the help of some Stuka bombing runs. The second half of the double envelopment is finally on the other side of the Vistula River and things are looking good.

With 4 turns remaining, and the double envelopment complete, I know have a large part of my force in the enemy rear area on both flanks, so I think I've got a good chance at a decisive victory. Stay tuned for more on Monday!
 

Travis7401

Douglass Tagg
Community Liaison
Scenario 2 - Danzig Corridor
Turns 11-14


At the beginning of the CPU's turn, two CPU AA guns move within range of my Stuka and both get lucky to score huge losses and shoot my stuka down. I was pissed at myself about losing my recon unit early in the scenario, but that was just a careless mistake. I parked this stuka out of range of both AA guns, and both made desperate moves out of entrenchment to be within range. Just bad luck this time, and I immediately replace the Stuka with my prestige points since they are invaluable at this point in the war. Fortunately the bad luck stopped before I lost my Panzer 38t as well. It was smacked down to 1 remaining unit, but survived

Turn 11: I moved the Aux force South toward Torun, bringing arillery support with me. Most of the Panzer Group B force required either resupply or reinforcement, so this turn was mostly about gearing up for the rest of the battle. I brought Panzer Group A north, completing the double envelopment maneuver and started smashing away at the enemy artillery guarding Torun. If I had chosen to take Torun with a frontal assault, it would have been tough with entrenched infantry and AT gun units backed up by artillery. By working my double envelopment, I was able to attack the rear or flank areas of the most heavily guarded objectives and destroy the artillery support before dealing with entrenched units. Near the end of the turn I purchased a replacement JU87 unit. In each scenario, you only get to deploy a certain number of units. If one of those units is destroyed during the battle, you can then deploy a new unit from your reserves or you can purchase a new unit.

Turn 12: With the lead elements of Aux group and Panzer Group A now reconnected in the enemy rear area, I moved units to set up an artillery backed assault on both Rypin and Torun, the last objectives held by the enemy. I continued to work on destroying the enemy AA and Artillery in the rear of Torun. I was able to suppress and destroy enough of the AA to bring my Stukas in and finish both units off. With Air power now free to bombard at will and no artillery support, I can begin to work on digging the entrenched infantry out of the cities. It usually takes 2-3 turns to dislodge entrenched enemy units without taking heavy losses, so I might have to press more than I'd like in order to earn a decisive victory. Fortunately the Polish infantry aren't great, so I still have high hopes. I tried to attack the entrenched enemy infantry in Rypin with 3 of my units. All 3 of my units suffered pretty heavy losses, but I managed to reduce the entrenchment level of the infantry and reduce their strength to 4. That city should fall next turn. With Panzer Group B, I destroyed the last remaining enemy infantry unit near Bydyoszcz, which was more stoutly defended than I had initially anticipated. Panzer Group B is built for siege operations, so the assignment fit them well.

Turn 13: I started off by bombarding the infantry guarding Torun with 3 artillery units that are now in range and then bombarding Rypin with my Sturmpanzer 1. Having artillery support for attacking cities is very important for reducing losses to the attackers. I also flew my stukas and BF109 in and did some pretty solid damage to the 3 remiaining units near objectives. With that softening up complete, I was able to destroy the AT near Torun and the infantry unit guarding Rypin. The infantry unit guarding Torun surrendered near the end of the turn, but I had no units available to capture the city yet. With decisive victory pretty much guaranteed, I turned my attention to destroying a few extra enemy units and capturing a few non-objective cities in order to increase my prestige.

Turn 14: I captured Torun and then attempted to capture a few remaining non-objective cities with a little success, capturing 2 extra cities and failing to capture a third.

Conclusion - Despite tougher than expected enemy opposition to Panzer Group A in the South, the double envelopment ended up working very well and allowed me to strike destroy the enemy AA and Artillery units for 2 key cities before attempting to take them. I'm not sure I could have met the time limit if I'd tried a frontal assault on Torun. I think I would have been bogged down by the river and opposition too long to have made it to Rypin in time. I lost 2 core units, which is a bummer and both will need to be replaced. 1 was lost due to carelessness from me and the other was just bad luck.

Full Danzig Video if you'd rather watch all at once:
 
Last edited:

GR8 2 B FL G8R

Well-Known Member
The Mystique of Mystikal

On June 26, 2003,[sup][1][/sup] Michael "Mystikal" Tyler pleaded guilty to sexual battery and extortion. On January 15, 2004, Tyler was sentenced to six years in state prison after pleading guilty to forcing his hairstylist to perform sex acts. He also admitted to extortion. The rapper and two bodyguards forced the woman to perform oral sex, and accused her of stealing $80,000 in checks. As part of a plea bargain, all three pleaded guilty. Tyler initially held firm that the incident was consensual. A videotape of the incident was found at his home shortly after the charges were initially made. Negotiations during the trial held the videotape from being entered as evidence and Tyler agreed to the plea bargain offered by the prosecution, avoiding the mandatory life sentence for sexual battery in Louisiana and expecting to receive probation. The case took a twist when the judge viewed the videotape at the sentencing, took into account Tyler's two prior arrests (for drug and gun possession) and had him remanded into custody to begin serving a six-year sentence immediately. Bodyguards Lelansd "Pokie" Ellis and Vercy "V" Carter also pleaded guilty to sexual battery.[sup][4][/sup]
In August 2005, while incarcerated on the state sexual battery and extortion charges, Mystikal was charged federally with two misdemeanor counts of failing to file tax returns for 1998 and 1999. On January 12, 2006, he was convicted in federal court of the tax offenses, but was allowed to serve the one-year federal sentence concurrent with his six-year state sentence.[sup][9][/sup] Mystikal was incarcerated at Louisiana's Elayn Hunt Correctional Center. On January 19, 2006, Mystikal was denied parole at a parole board hearing.[sup][10][/sup] On January 11, 2007, Mystikal was released from custody on the federal misdemeanor tax convictions (as his one-year sentence had expired), but he remained in custody on the six-year sentence for the Louisiana state felony convictions. The news of his release caused confusion among fans who heard the news and mistakenly thought he had been released on parole.[sup][11][/sup] He was released January 14, 2010.[sup][12][/sup] After his release, Mystikal was registered as a sex offender. He currently resides in Prarieville, Louisiana.[sup][1][/sup][sup][13][/sup]
After his release Mystikal stated:
[xtable=bcolor:transparent]
{tbody}
{tr}
{td=top|left|20x@}“{/td}
{td=top}I was gone so long, all the things I achieved, all the accolades I attained, it felt like it was a dream. It felt like I'd never done that stuff. But watch how I shake this world up now — I want reparations.[sup][12][/sup]{/td}
{td=bottom|right|20x@}”{/td}
{/tr}
{/tbody}
[/xtable]
On February 22, 2012, Mystikal was arrested again following a dispute with his domestic partner and was later given a misdemeanor charge of domestic abuse battery. He was detained for nine days and then released on bail. On April 16, he was given a three-month jail sentence for violating the terms of his probation that he was given following his release from prison in January 2010. He was given credit for the nine days already served, reducing his confinement to 81 days. He began serving his sentence on May 14 at the East Baton Rouge Parish Jail.[sup][14][/sup] During his incarceration, he appeared in court to be heard on the actual domestic abuse battery charges as well as for a hearing to determine child support payments for his two youngest children. Mystikal was released from jail in mid-August 2012.
 

Travis7401

Douglass Tagg
Community Liaison
Scenario 3: Lodz

Here is the Scenario Description:


12597181654_f4dc8f02bc_o.jpg


So basically I'm supposed to Take Lodz and surrounding cities. In the middle of my orders, we receive word that a scouting force found a lightly guarded rail line that runs to the East of Lodz, behind all the fortifications. To earn a minor victory I must capture 3 objectives. To earn a decisive victory, I must capture 5 objectives and make sure at least 3 units from the auxiliary force survive.

Here is my strategic battle plan I've drawn up for the Lodz Scenario:
12584172164_695ece30e6_o.jpg


I have allocated my core forces in similar fashion to the previous mission. My plan is to send Pz Group A cross country as rapidly as possible to reinforce and protect the Aux group that is surrounded by Polish units. Once this link up occurs, I will drive North and try to capture the cities of Brezing, Glowino, and Lowicz while also attacking the lodz defenses from the rear. The mission briefing hinted at heavy fortifications and defenses near lodz, so attacking and destroying any AA or Artillery from the rear are will be essential. Pz Group B will first assault Sieradz and then slowly move toward Lodz. I will then position them in siege positions to attack lodz, but will not actually attack unti Pz Group A and the Aux group can destroy any artillery and AA support.

When I loaded the mission, I found out that high command rewarded me for the decisive victory in Danzig by giving me a "Special Elite" unit (Can't say SS in games that are sold in Germany). This special elite unit was a motorized infantry unit. Special Elite units have higher attack ratings and slightly lower defense ratings. The most important thing about them is that they don't count against deployment numbers. If I'm only allowed to deploy 18 units in a scenario, having a special elite unit allows me to deploy 18+1. Special elite units are semi-randomly awarded based on decisive victories. I can unlock a maximum of 2 of them in the 1939 campaign.

I was allowed to deploy 13+1 units in addition to the aux units already on the map, so here is what my core looks like at the start of Lodz:

Pz Group A: (6 units)
3 x Panzer 38t
1 x SDKFZ 222 Armored Car Recon unit
1 x Special Elite Infantry - Motorized
1 x Sturmpanzer 1 Mobile Artillery

Pz Group B: (6 units)
1 x Panzer 38t
1 x SDKFZ 222 Armored Recon Unit
2 x Wehrmacht Infantry - motorized
2 x Towed 10.5 cm Artillery with trucks

Air Force: (4 units)
1 x BF109 fighter
1 x BF110 fighter/bomber (just purchased this)
2 x JU87 Stuka dive bombers

Auxiliary Forces for this Battle: (5 units)
1 x SDKFZ 222 Armored Car
2 x Panzer 1a
1 x Panzer 2c
1 x Panzer 38t


I will be doing Youtube videos with live commentary. I'm thinking 2 turns per video so I have a little more time to focus and make the right decisions and talk about what/why I'm doing certain things.
 

Travis7401

Douglass Tagg
Community Liaison
The live commentary videos are even better than I ever imagined. :laughing: 
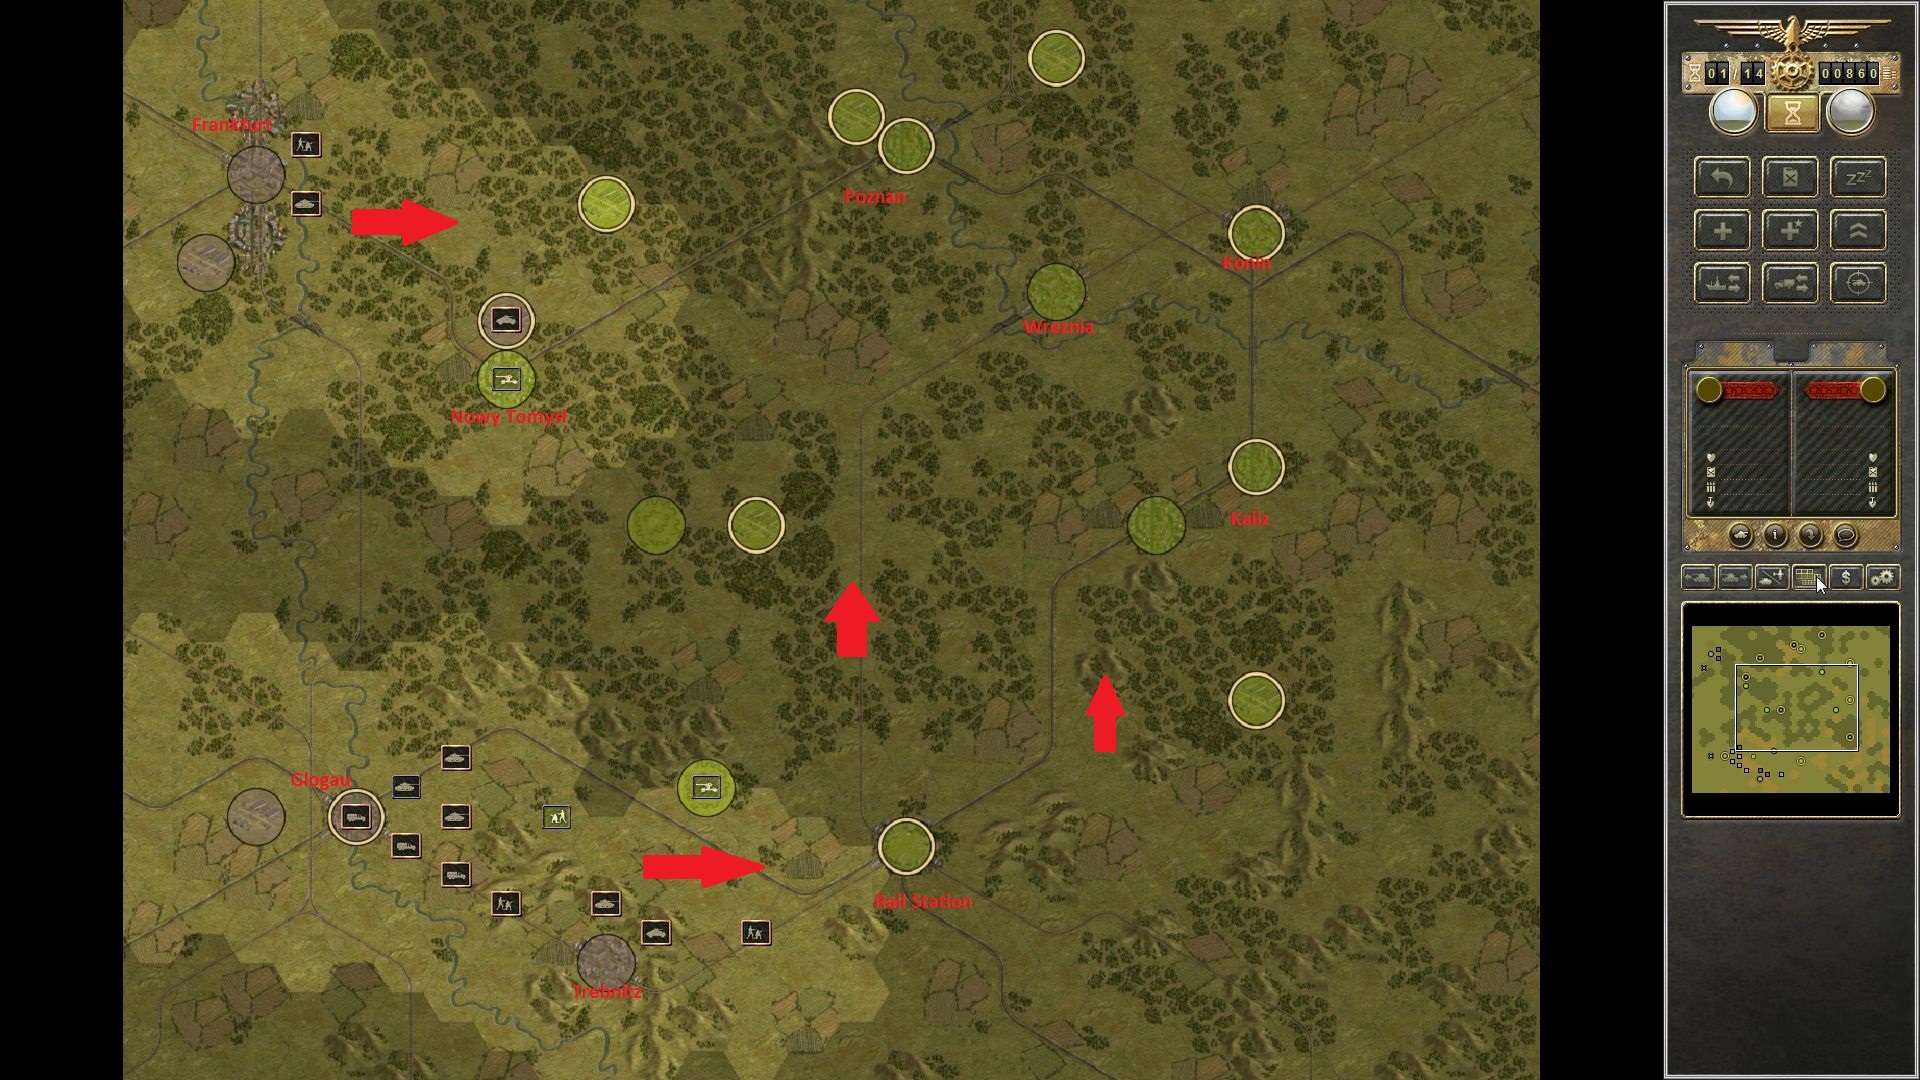
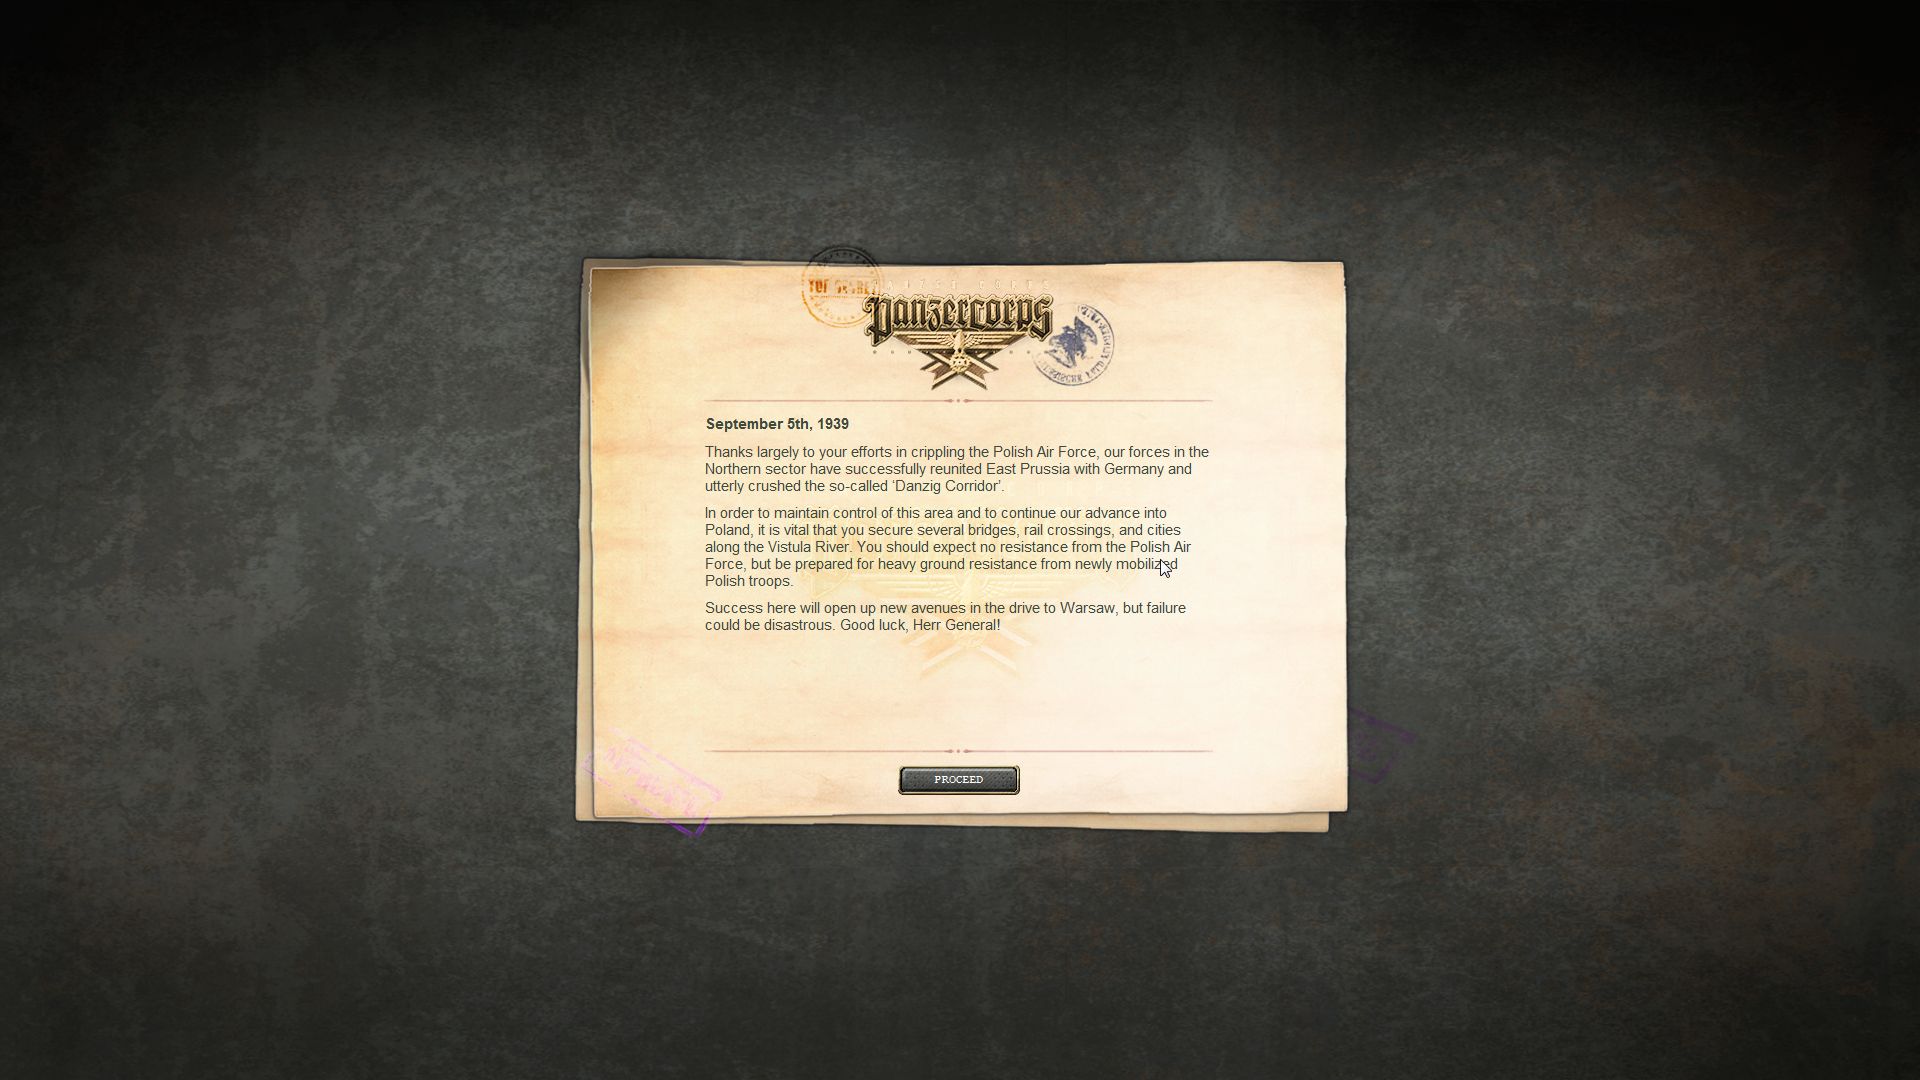
If you don't care about the Panzers, then at least follow this thread for the disaster that is me talking while trying to think at the same time. I kept pointing at the computer screen to describe shit and then realized that ya'll can't see my hands. Hmmmmm.

My dogs freaked out at least once when an Amazon delivery came. Stick around for when I release videos 5 and 6 later in the week for that thrilling commentary.
 

Travis7401

Douglass Tagg
Community Liaison
Scenario 3 - Lodz
Video 1/6


Turn 1 was just boring movement. The computer hammered my Aux force units, so I have to try to retreat them. Turn 2 featured some limited combat and bombing by my air force followed by the CPU hammering even more of my aux units, leaving 2 of them heavily damaged. With the Decisive victory requiring me to keep 3 of the aux units alive, things are not looking good!
 
Last edited:
Top